
An update has been released, and here is an overview of what was improved in Bankfeed version 30.0
Contact us
Feel free to leave your question here and we will email you the answer as soon as possible.


An update has been released, and here is an overview of what was improved in Bankfeed version 30.0
Check out the features of Bankfeed.
In previous versions of Bankfeed, the Text-to-Account mapping feature could only be applied to the “Message to Recipient” field, leaving out other important fields. However, there were cases where repeated text also appeared in other fields, such as “End to End ID,” “Additional Transaction Info,” “Creditor Reference,” and others.
Now, we are introducing the capability to set Text-to-Account mapping rules for any Statement Line field.
For example, if the repeated text is “WAGES,” it may appear in the “Additional Transaction Info” field.
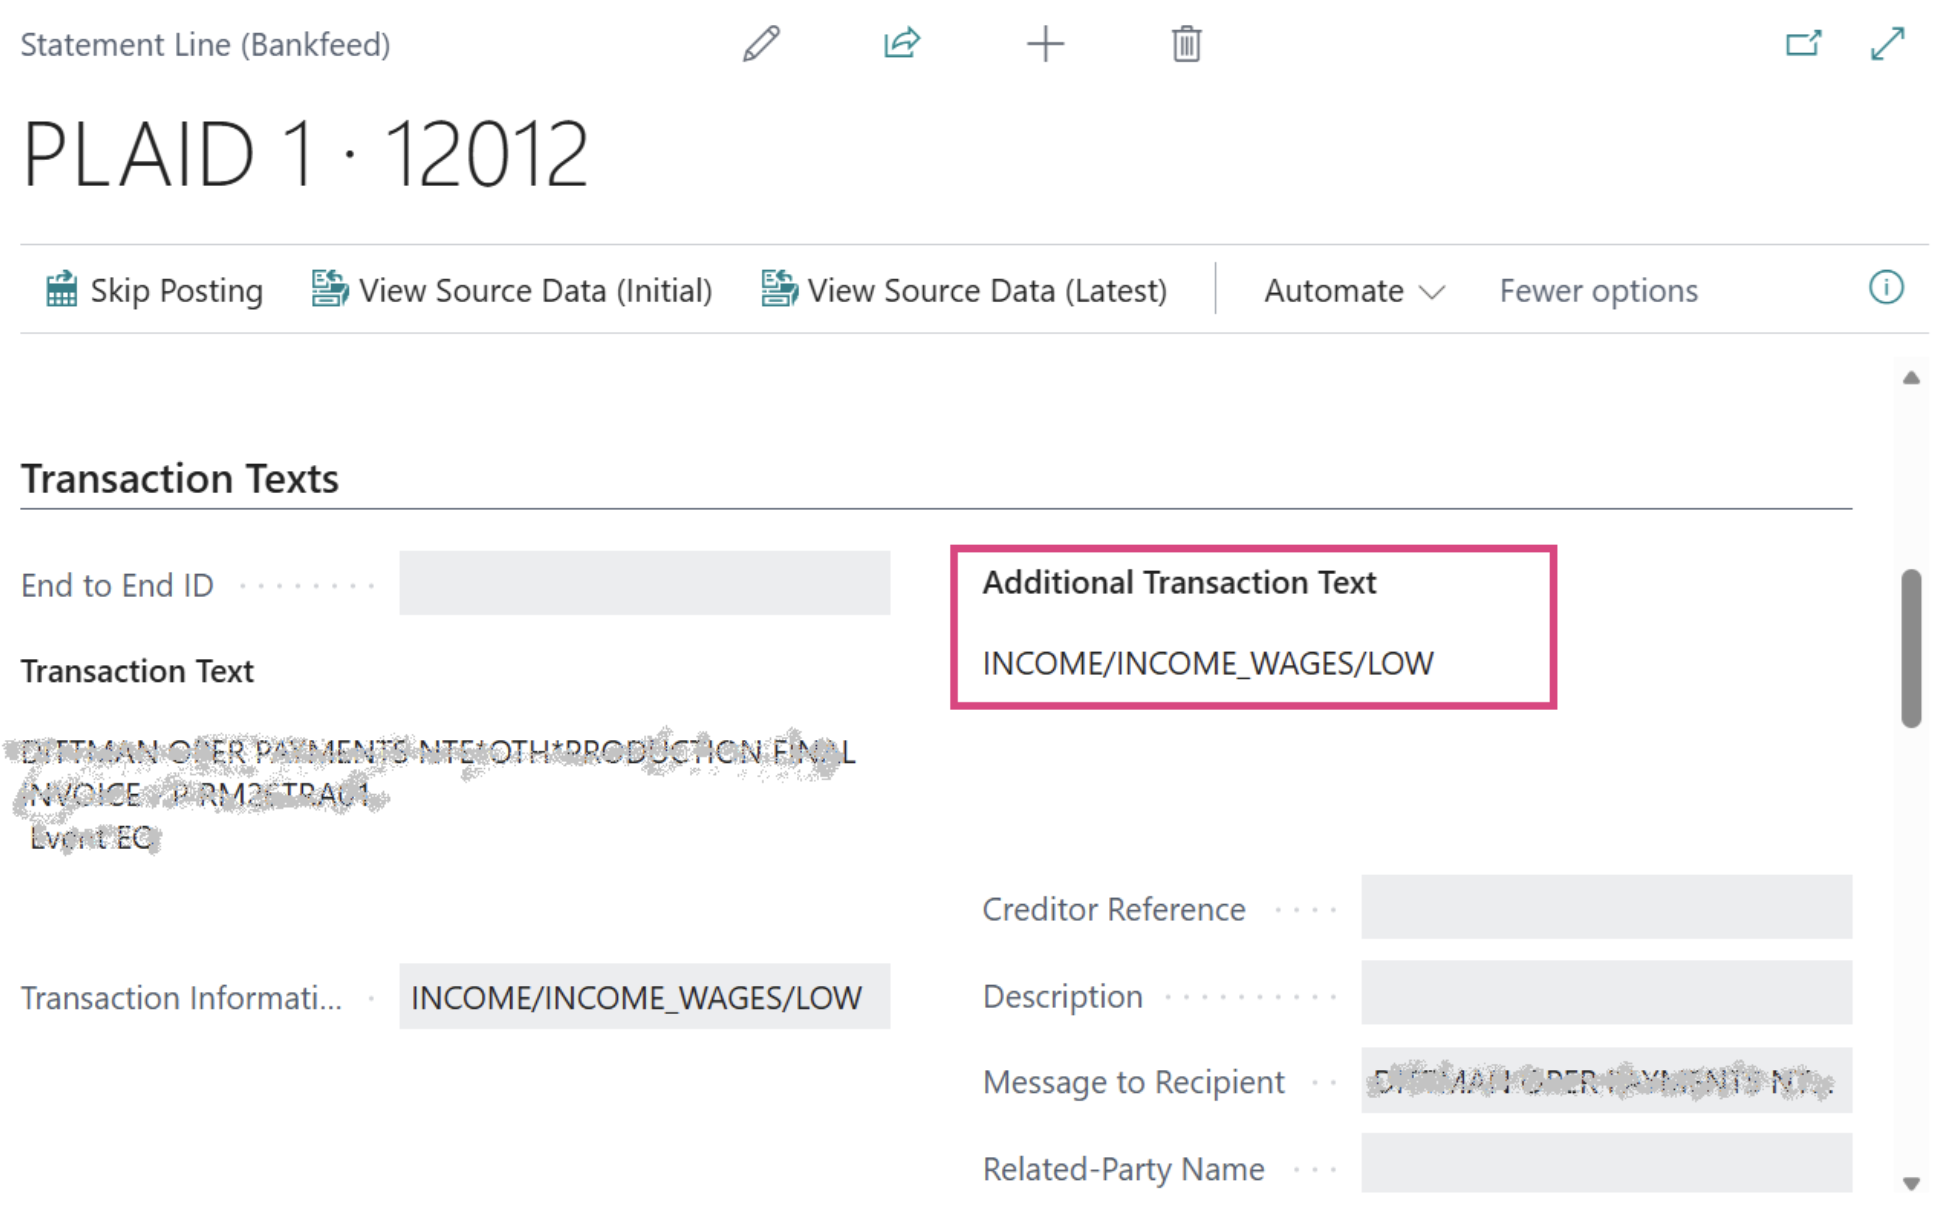
To add Text-to-Account mapping rules for custom fields, follow these steps:
1. Open Text-to-Account Mapping (Bankfeed)
2. Enter the desired text and configure any additional fields as necessary
3. Click on “Custom Fields“>”No” to open the setup page

4. Click “+ New” to add a new field value. For instance, you can enter “350” for the Additional Transaction Info field
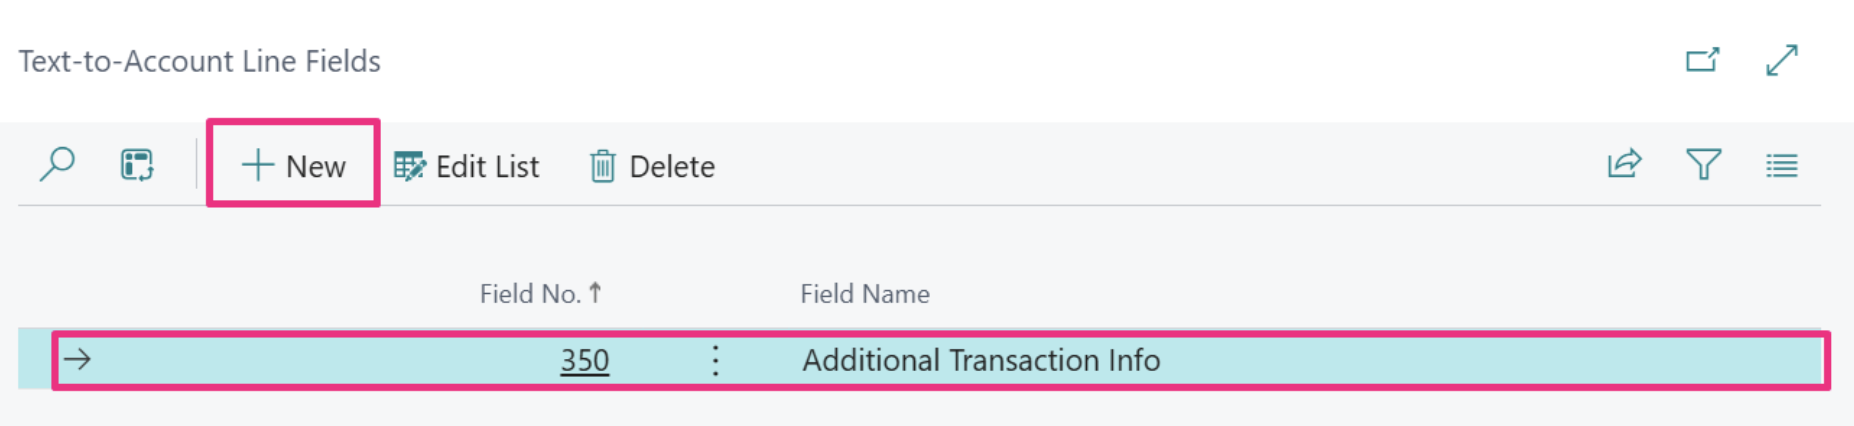
By following these steps, you can effectively customize your Text-to-Account mapping setup to include relevant fields beyond just the Message to Recipient.
We have redesigned the Text-to-Account Mapping (Bankfeed) setup page. For cases where mapping texts need to be applied to specific bank accounts, the bank account setup can now be found below the section titled “Mapping by Banks.”
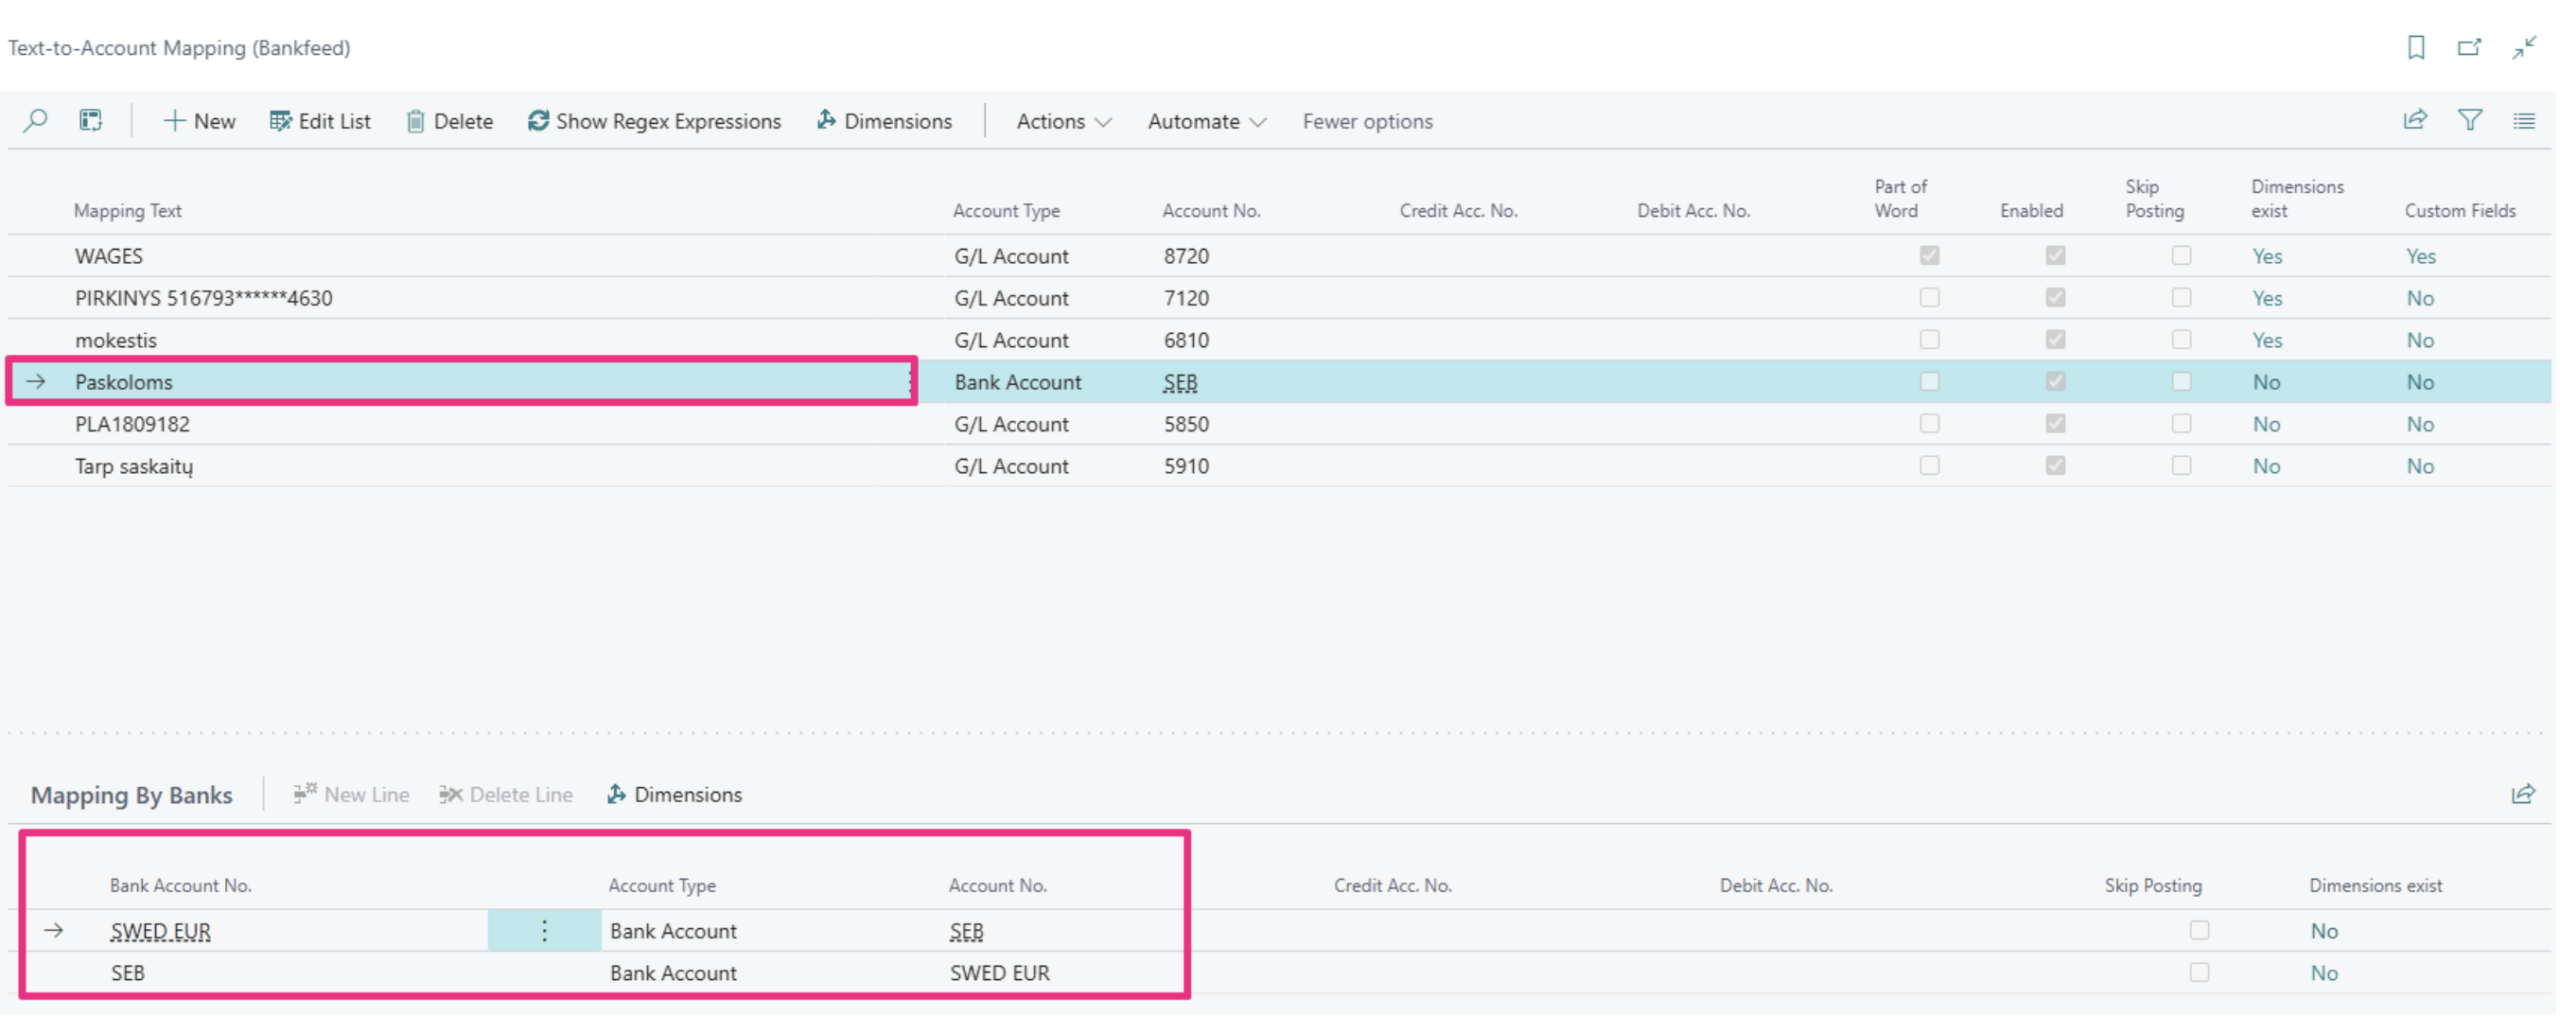
All your existing setups will be automatically upgraded with the Bankfeed version upgrade.
Previously, Bankfeed recognition was only available for Payment and Cash Receipt journals. Therefore, customers using the Payment Reconciliation Journal relied on the standard Business Central functionality for recognition. However, in this new version, users can now activate Bankfeed recognition in the Payment Reconciliation journal as well.
If you would like to activate Bankfeed recognition in your Payment Reconciliation journal, please follow these steps:
1. Open Links (Bankfeed) and navigate to Integration Setup (Bankfeed)
2. Check the box next to “Enable Bankfeed Recognition”
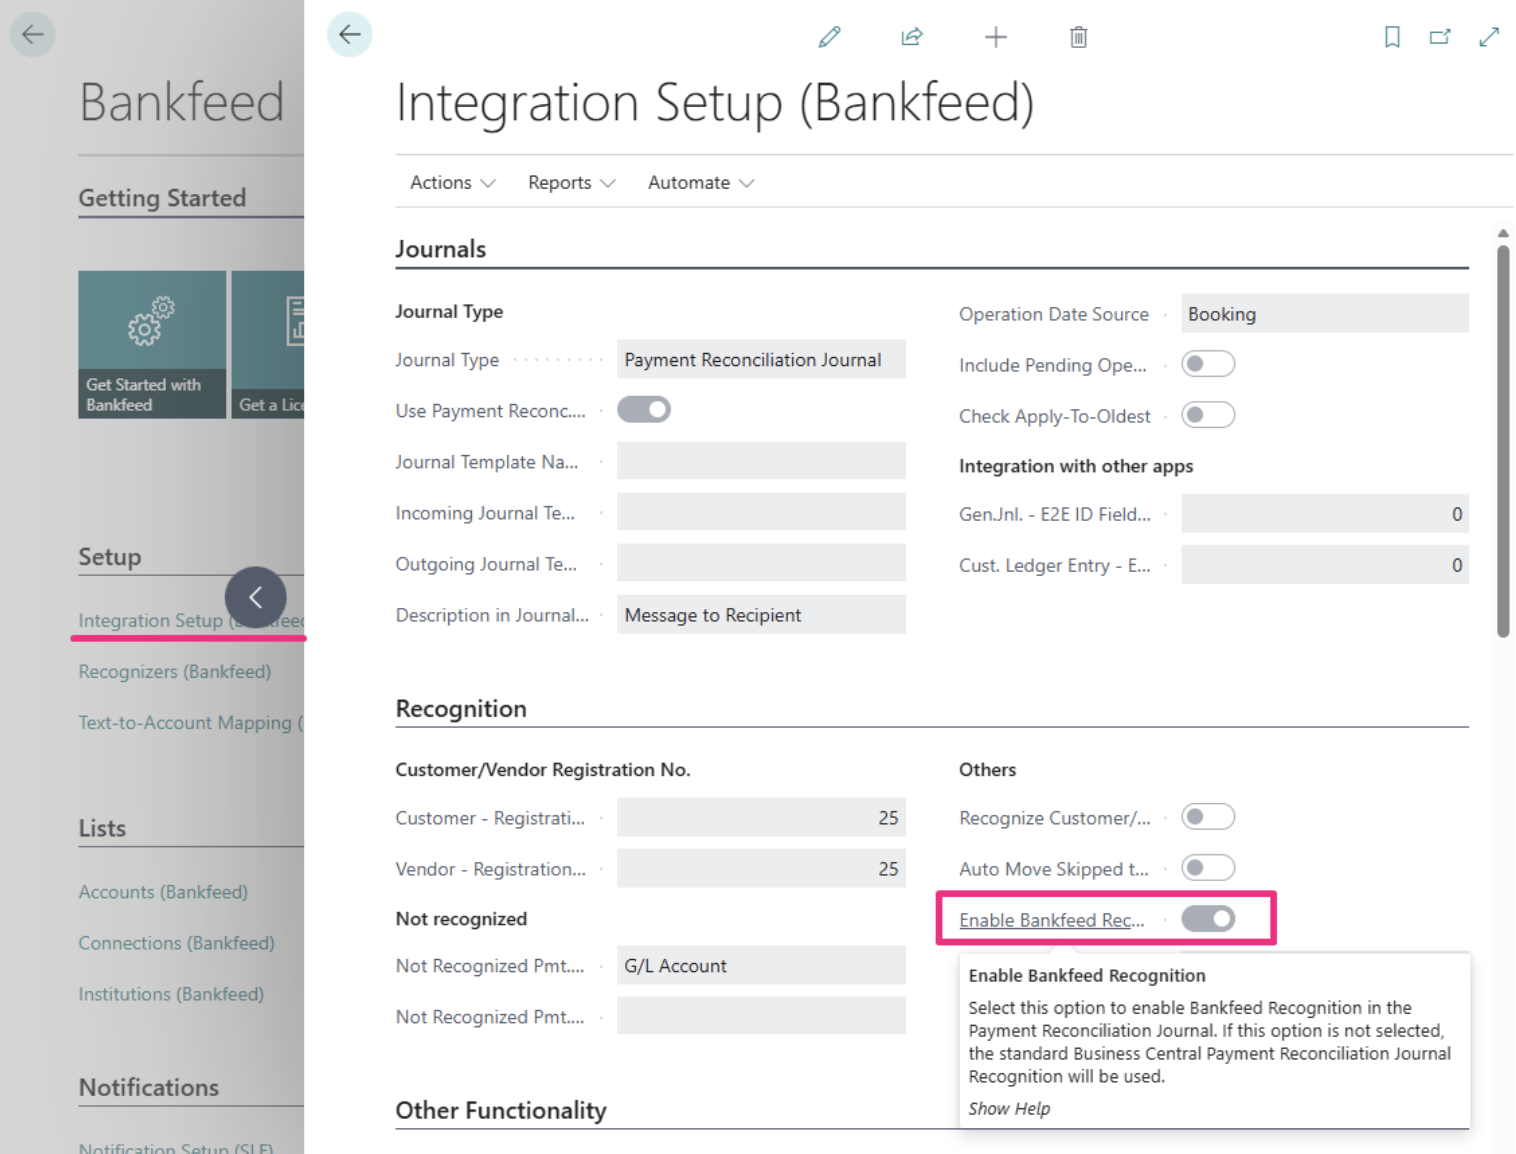
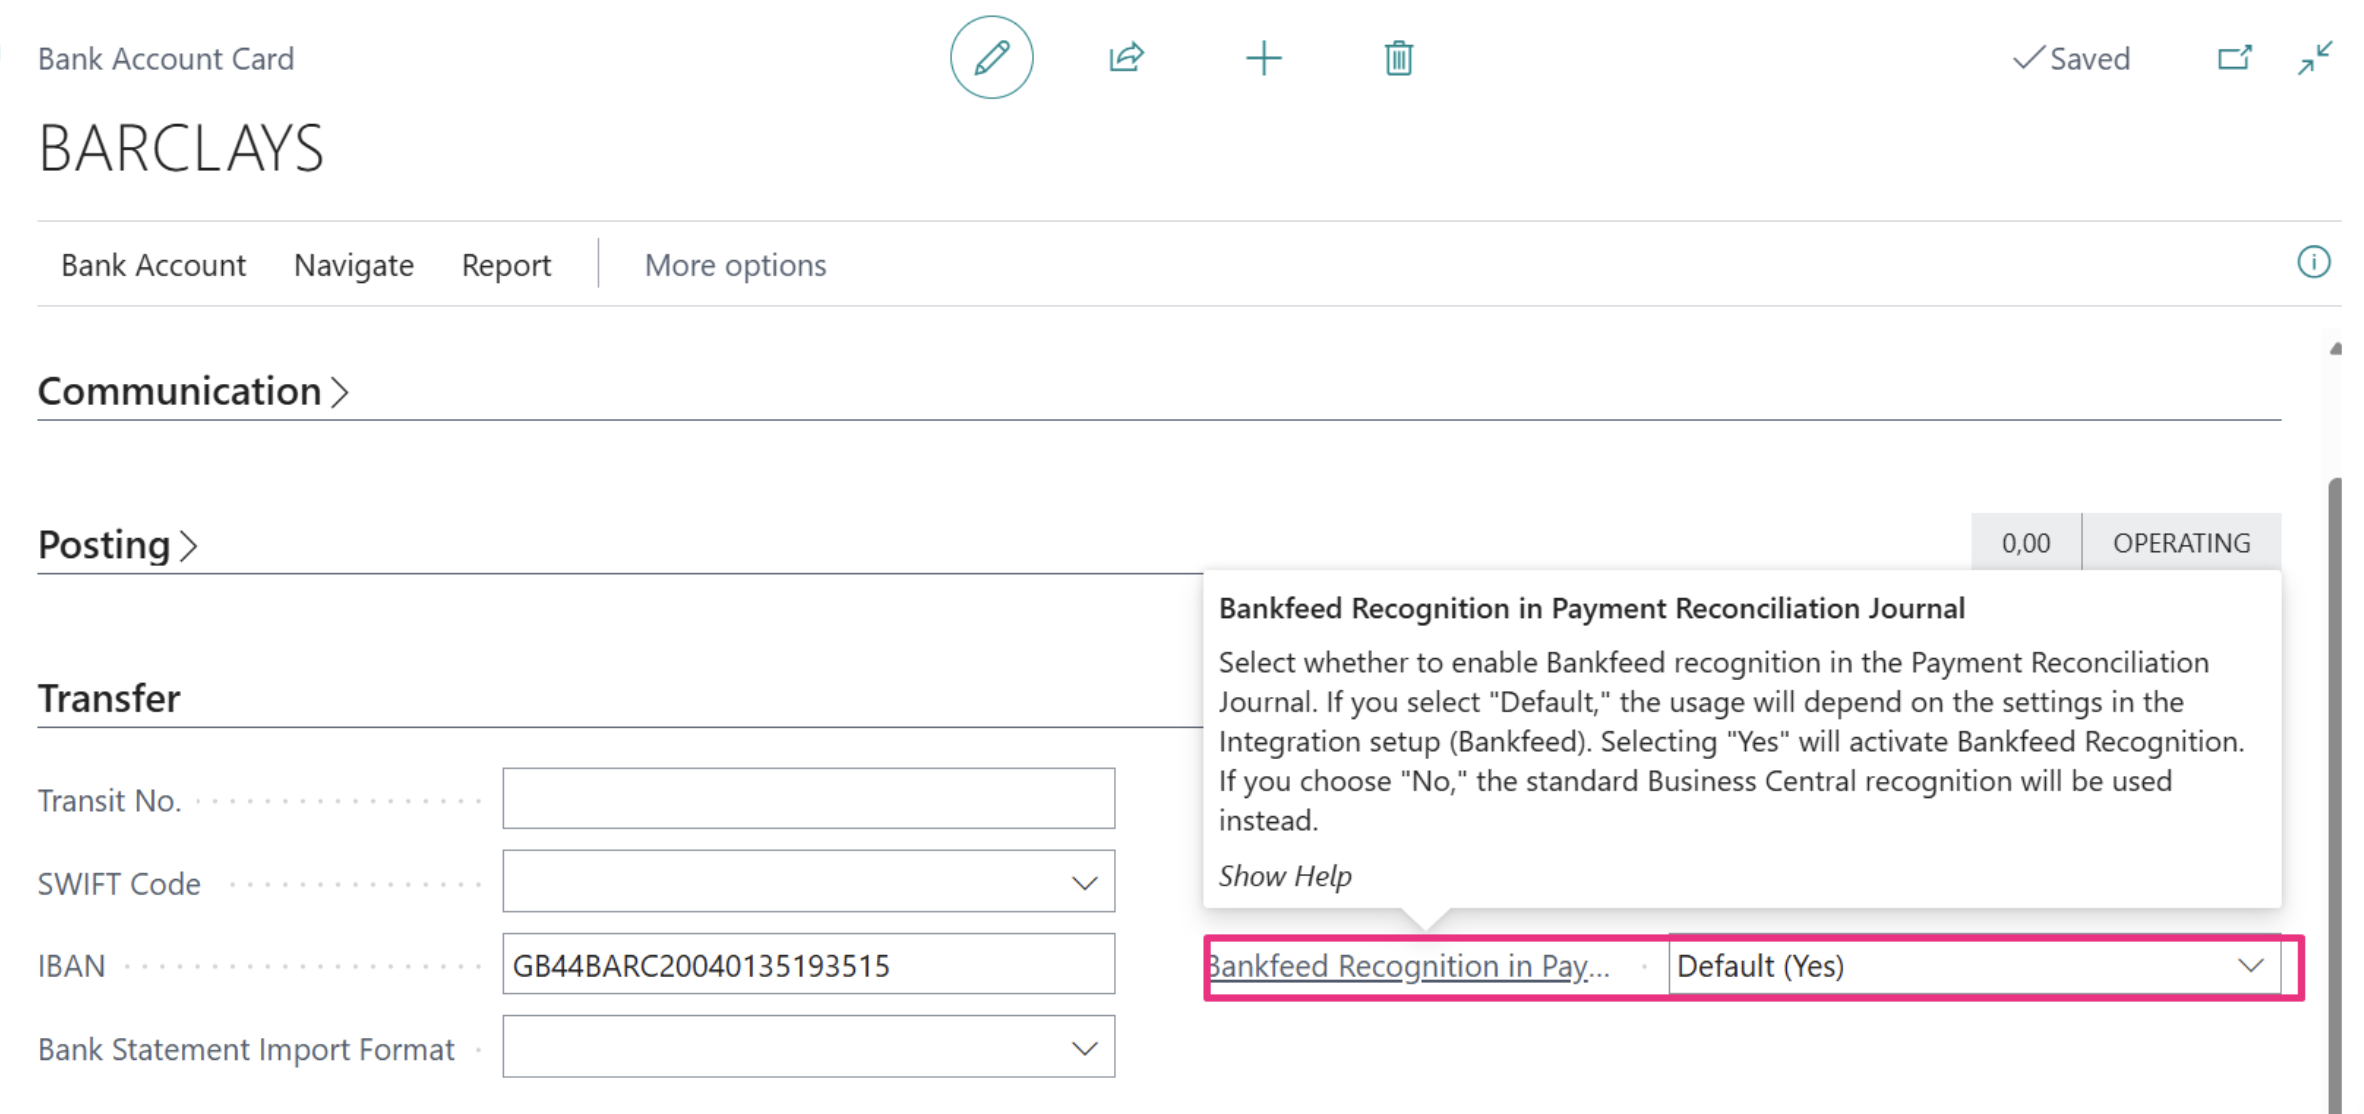
You can also manage Bankfeed recognition from the Bank Account card. If you do not wish to use Bankfeed recognition for certain bank accounts in the Payment Reconciliation Journal, you can disable it directly from the card.
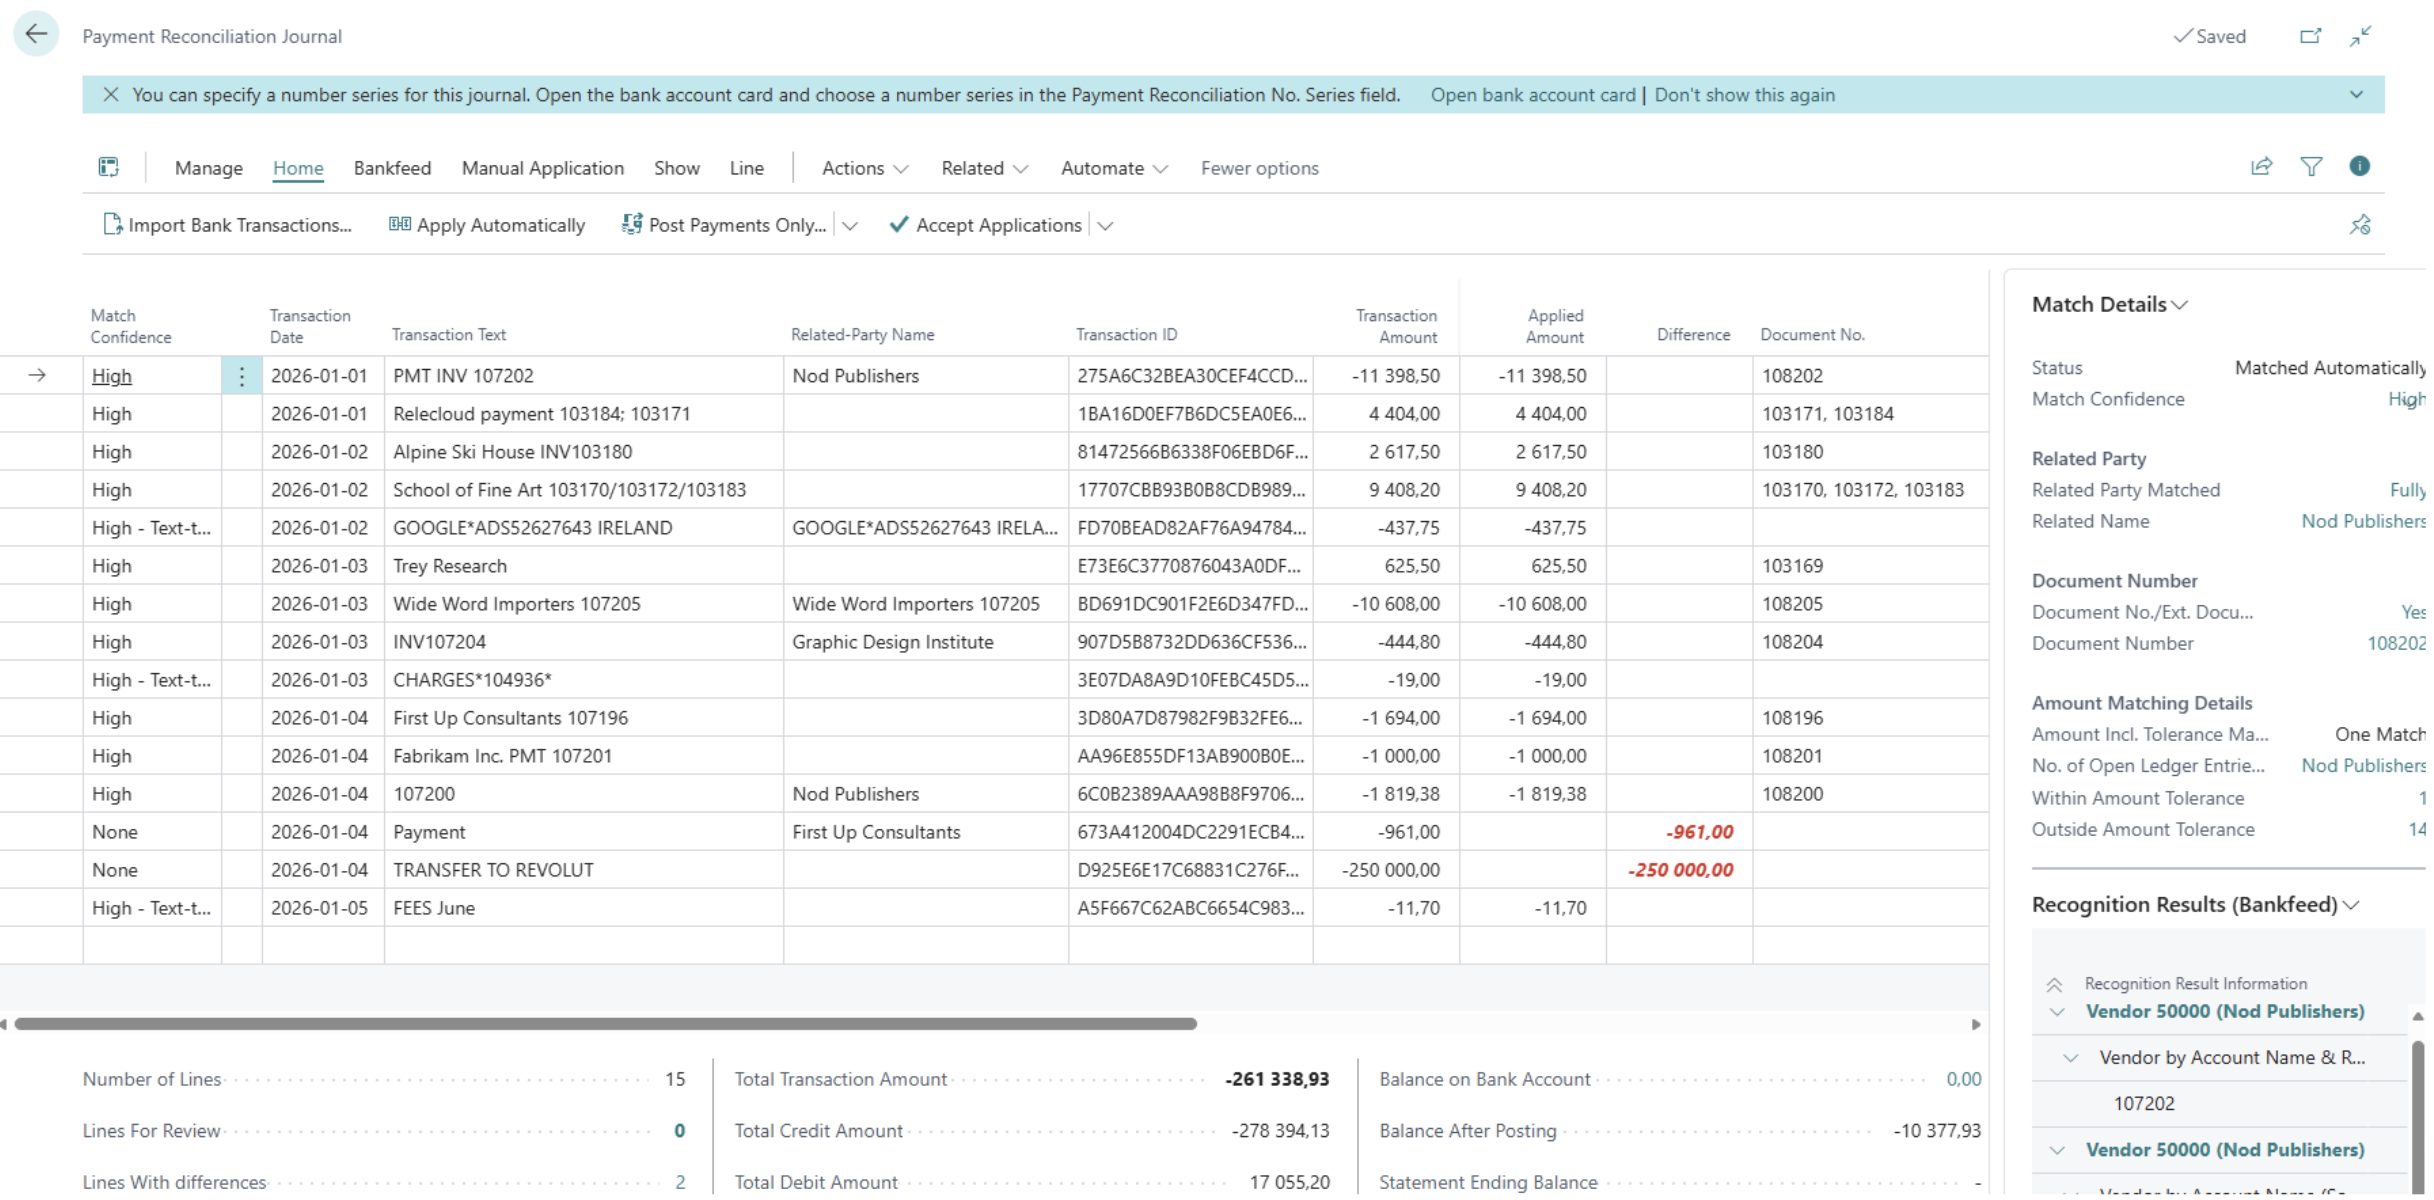
Bankfeed recognition in the Payment Reconciliation Journal is fully integrated into the standard journal’s process and does not require any additional setup.
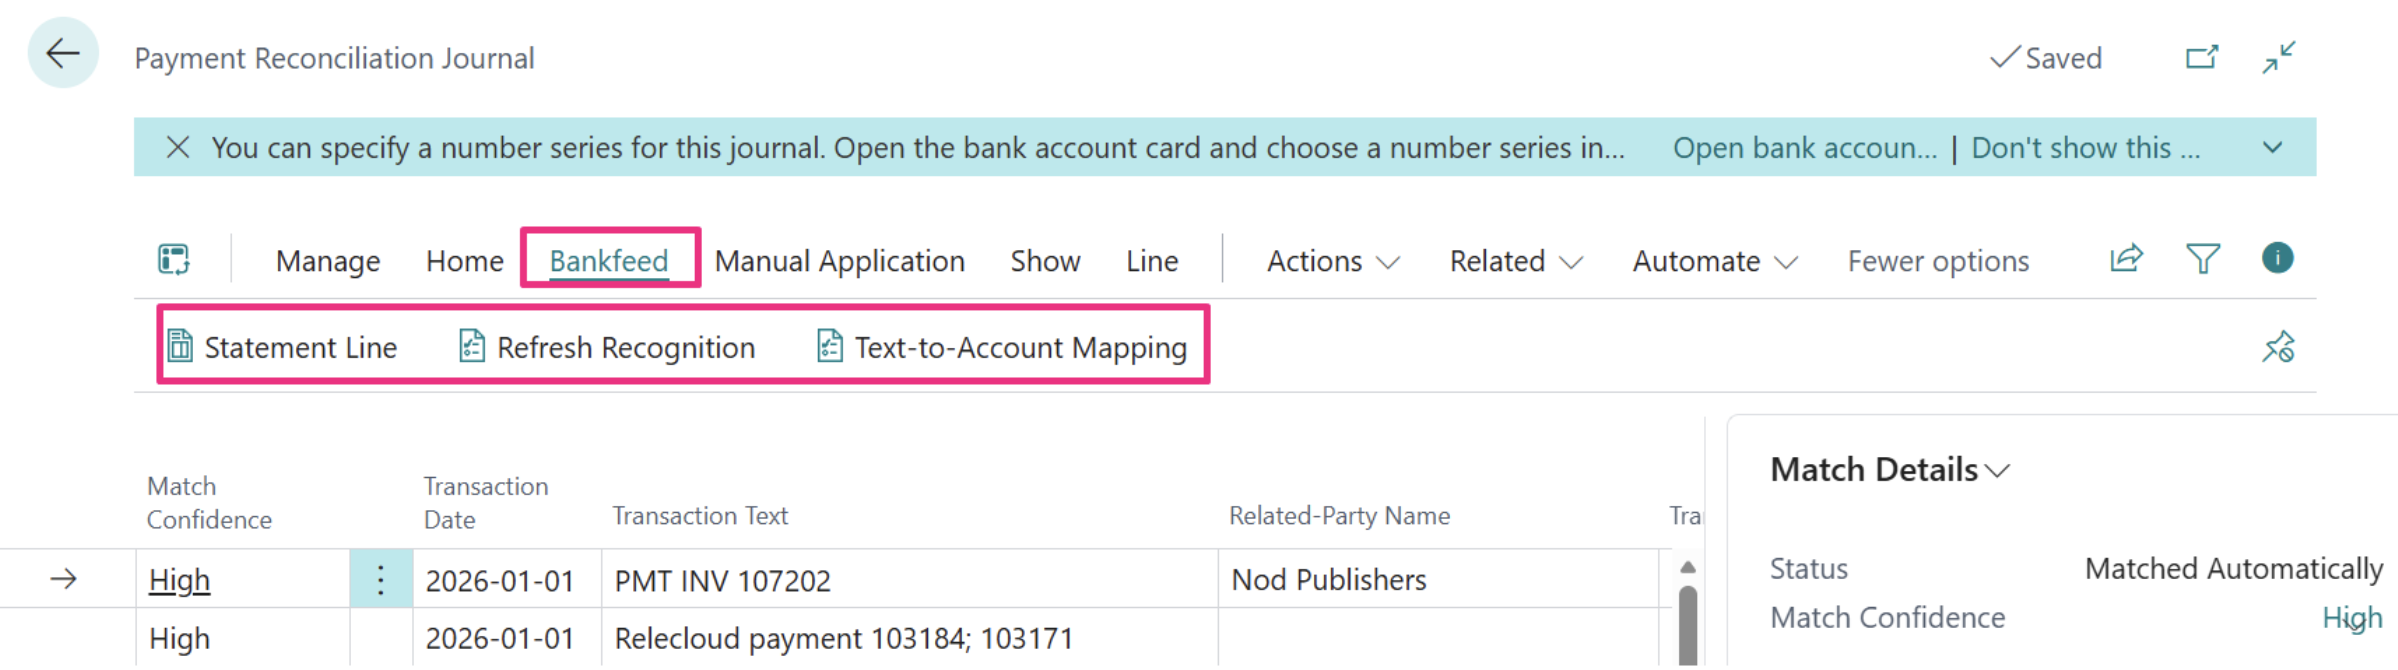
In the action pane, you will find an additional Bankfeed tab that provides access to key Bankfeed functions, including:
– Refresh Recognition
– Text-to-Account Mapping setup
– The ability to open the primary Statement Line with full transaction details
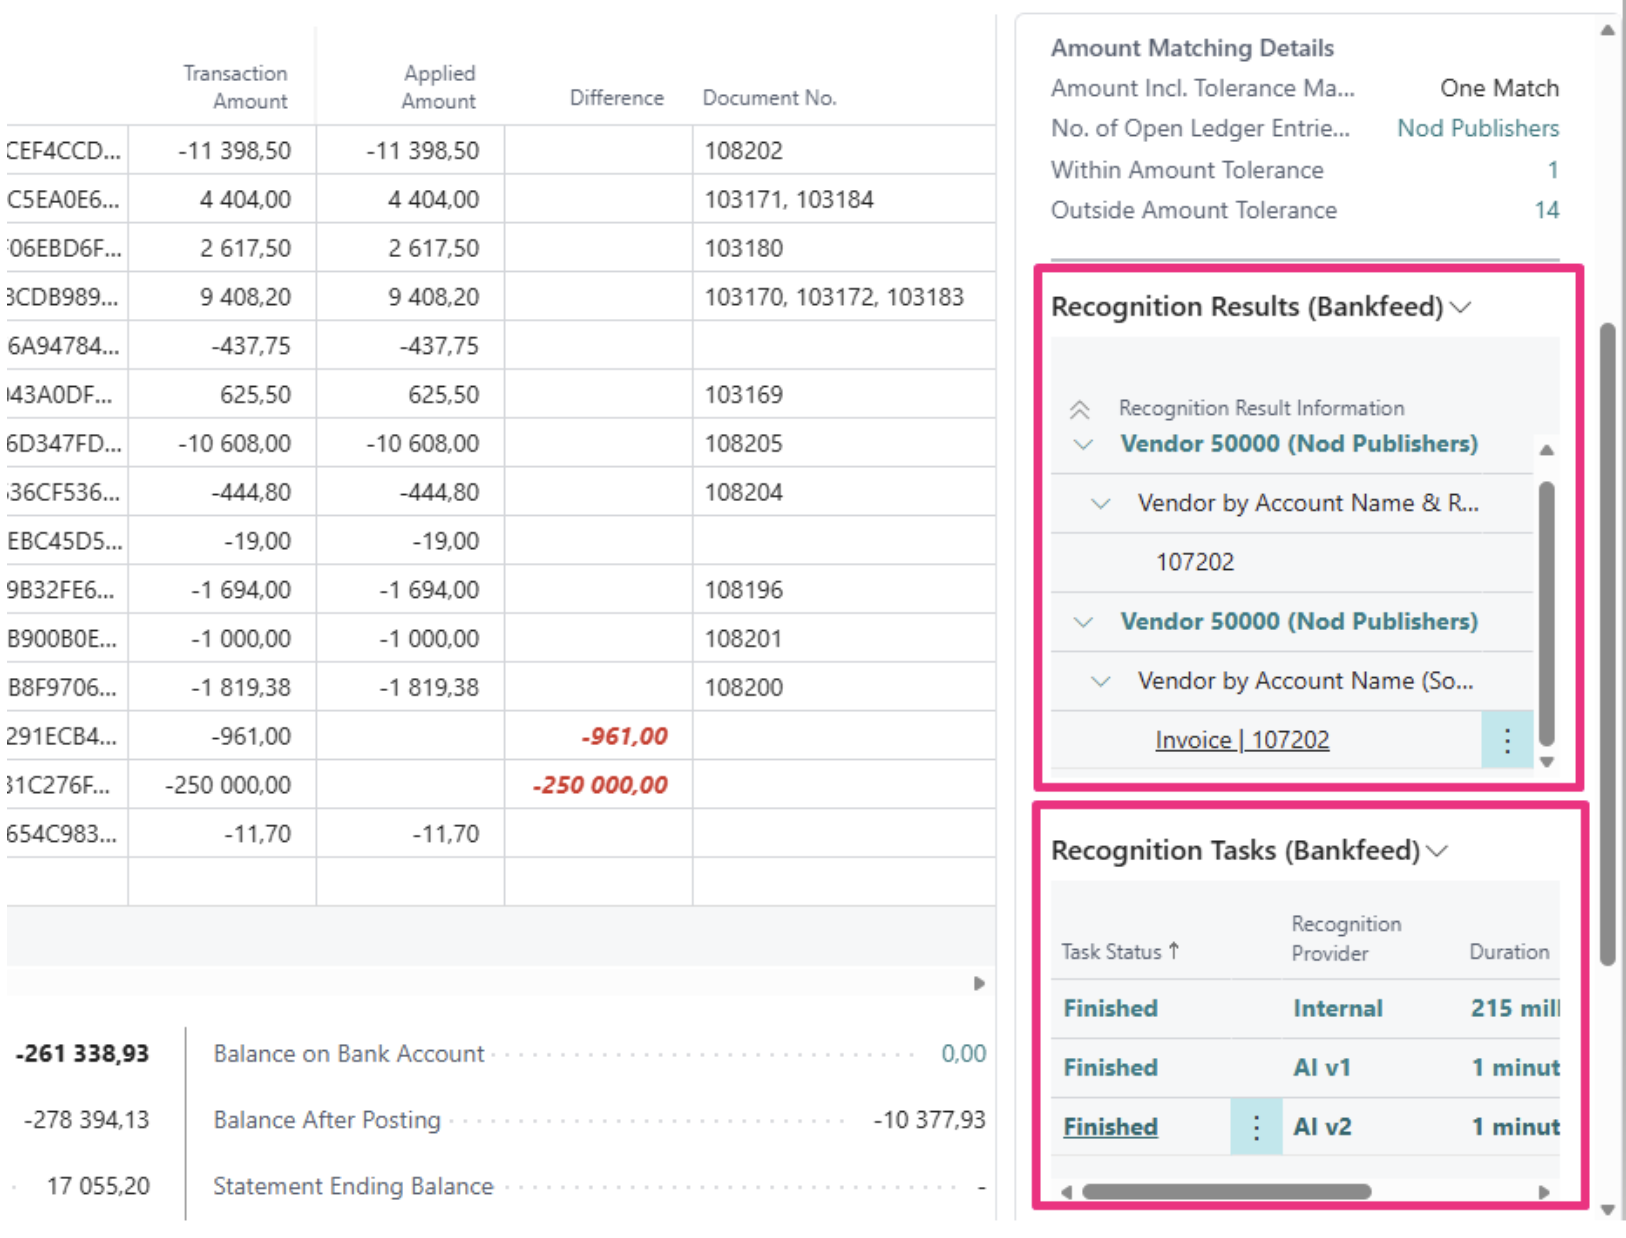
Additionally, in the FactBox area, you will find Recognition Results (Bankfeed) and Recognition Tasks (Bankfeed), where you can view the results of the Bankfeed recognizers and the status of various tasks.
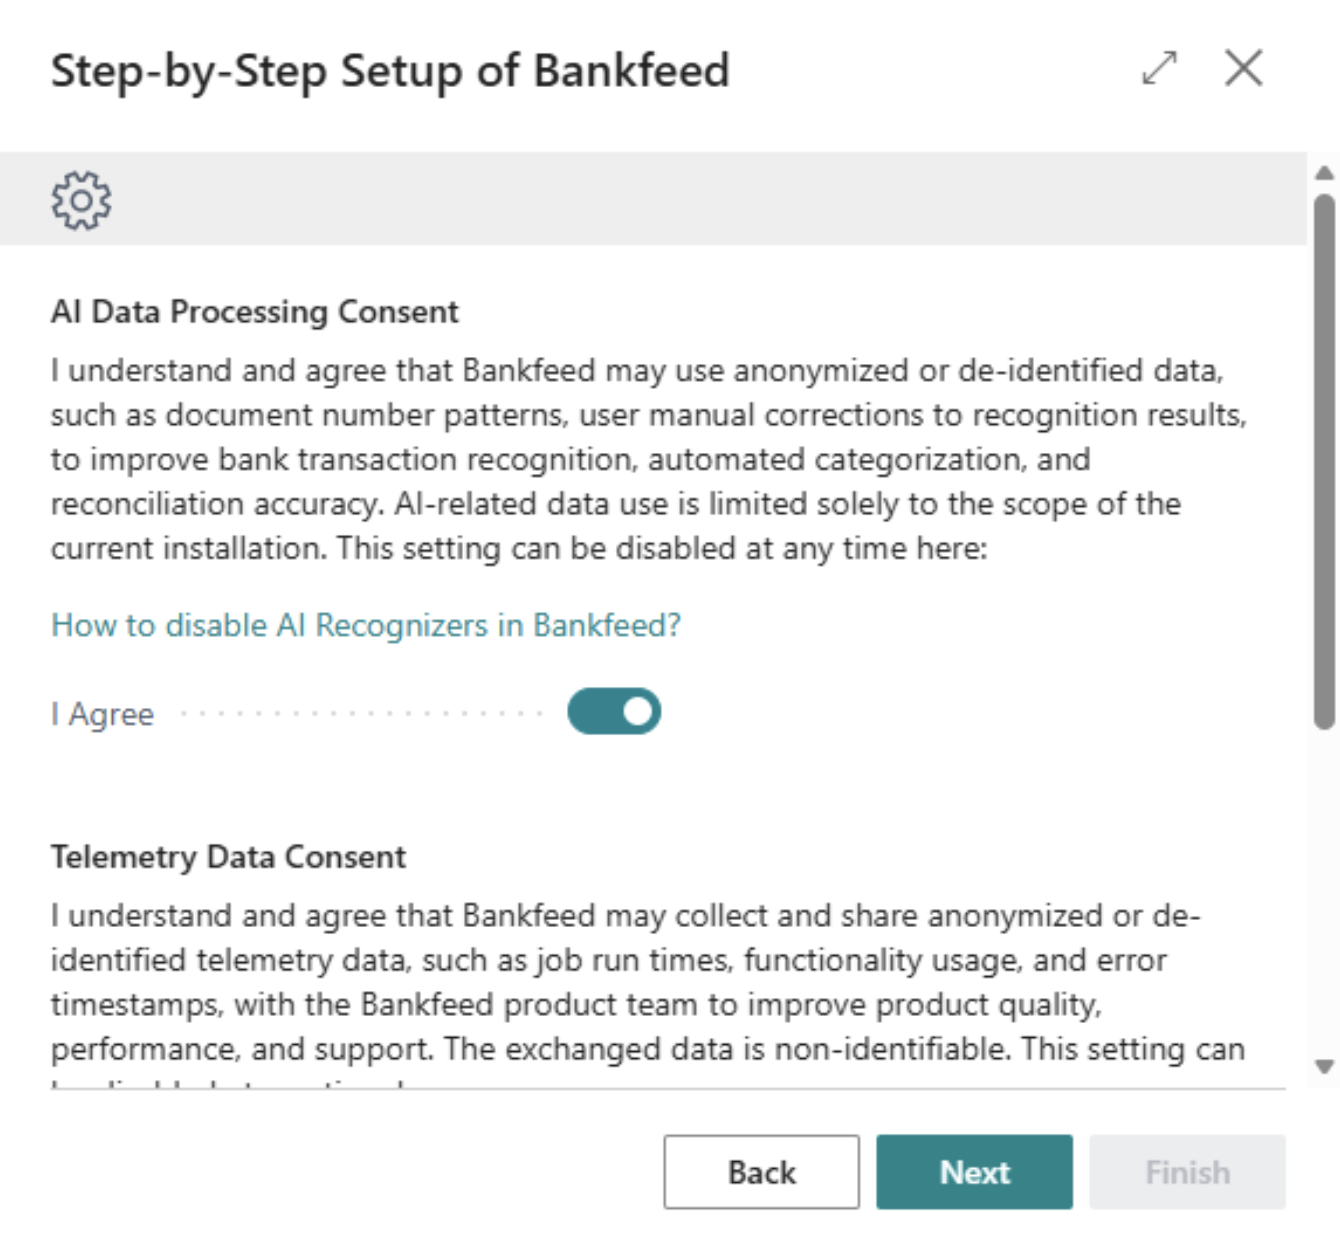
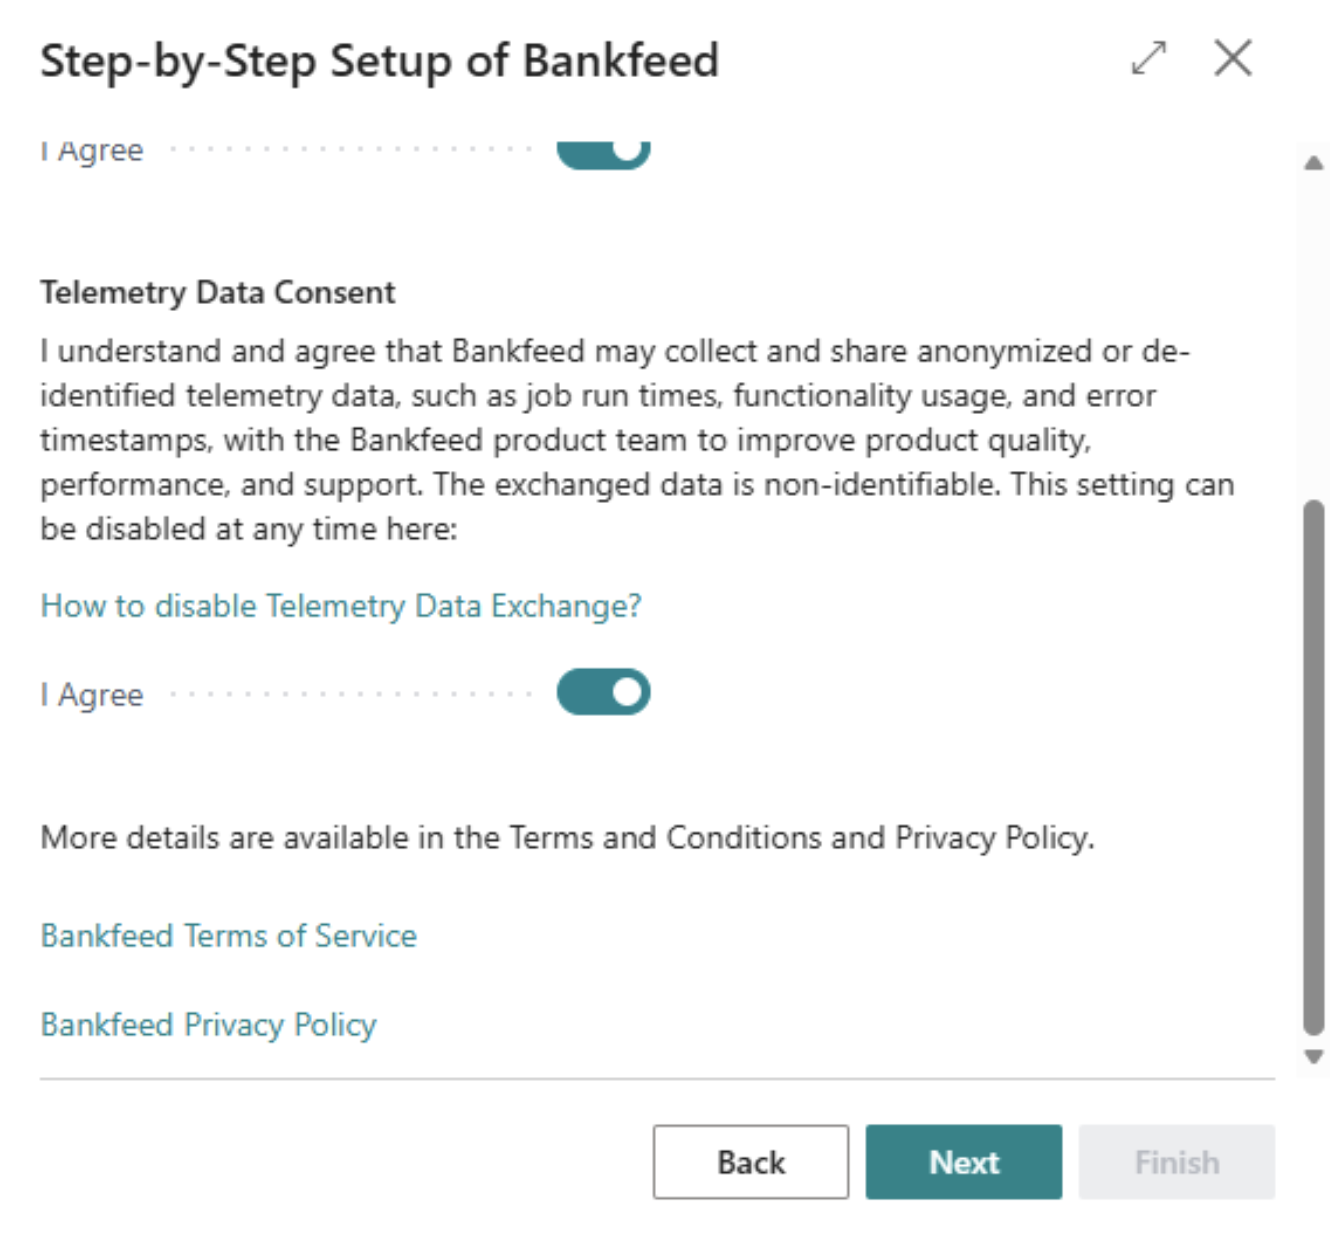
In the new version of Bankfeed, users must provide consent to send data for AI and telemetry purposes during the initial setup of “Get Started with Bankfeed”.
By default, the consent is enabled. However, users have the option to disable this by unchecking the “I Agree” button, which will turn off AI and/or telemetry data usage features.
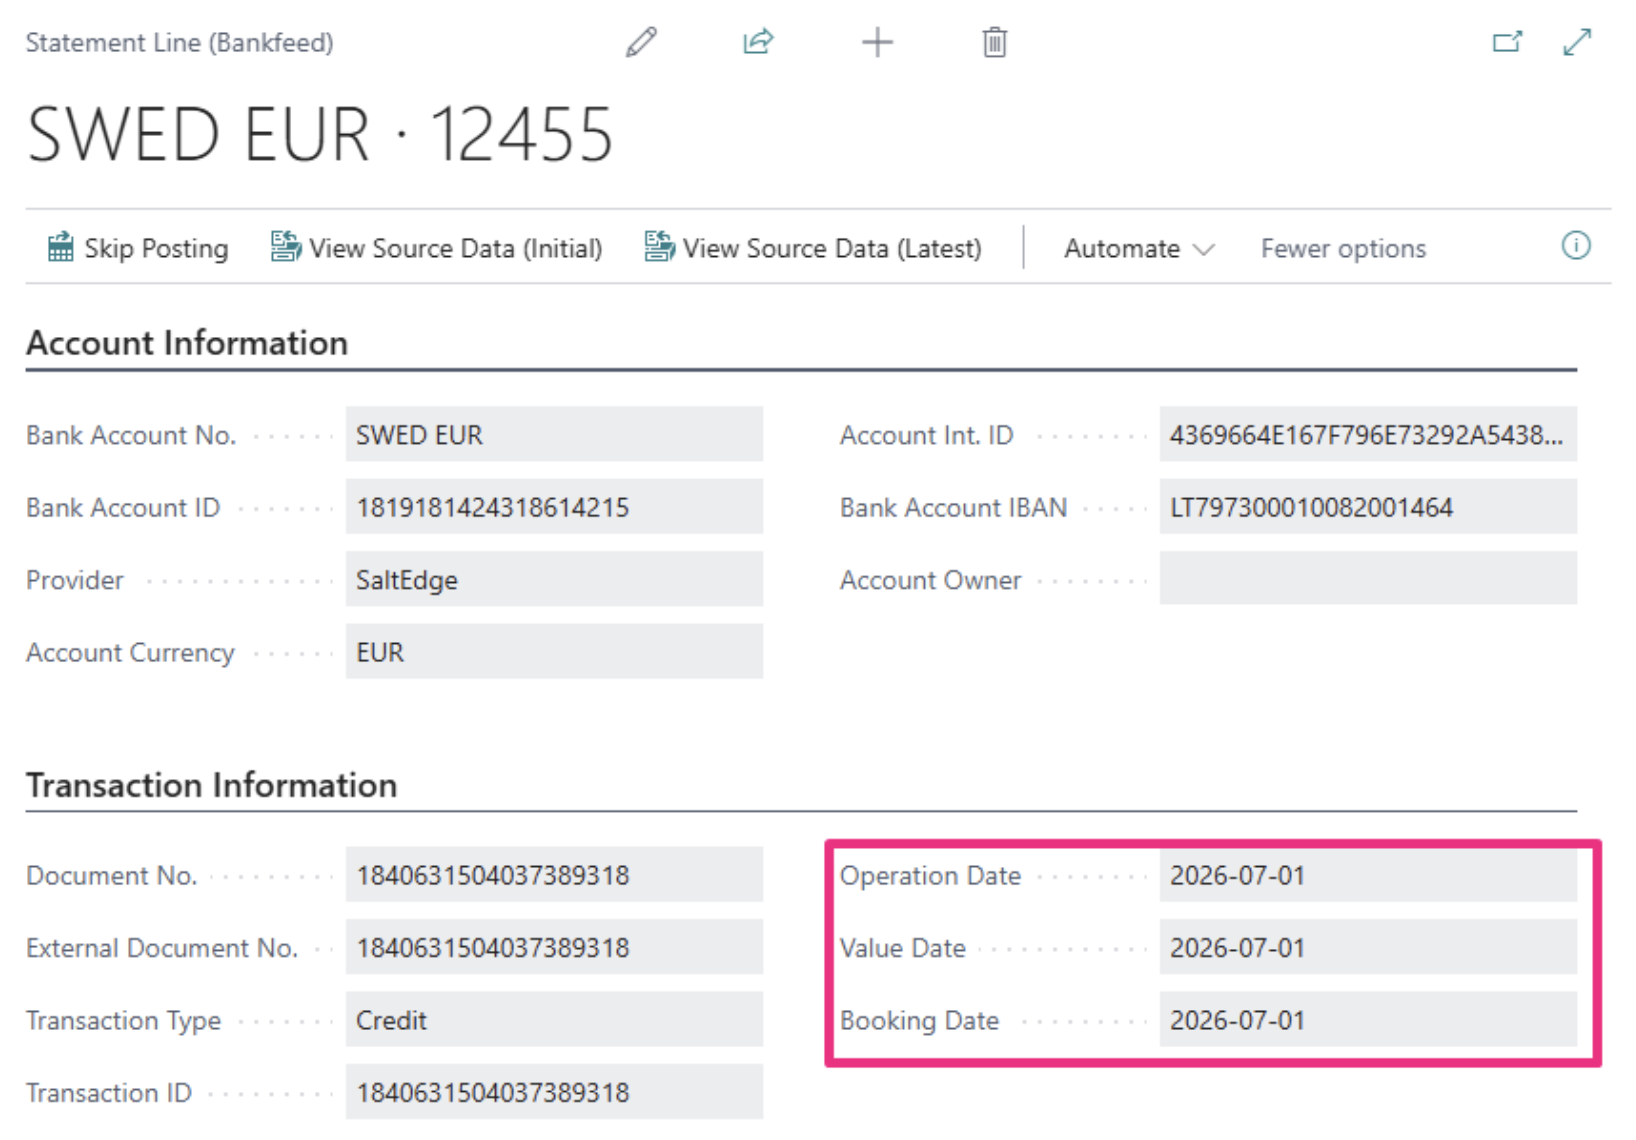
For some bank accounts, we need to use the Value date, while for others, the Booking date is more appropriate. In previous versions of Bankfeed, there was a single global setup for all bank accounts.
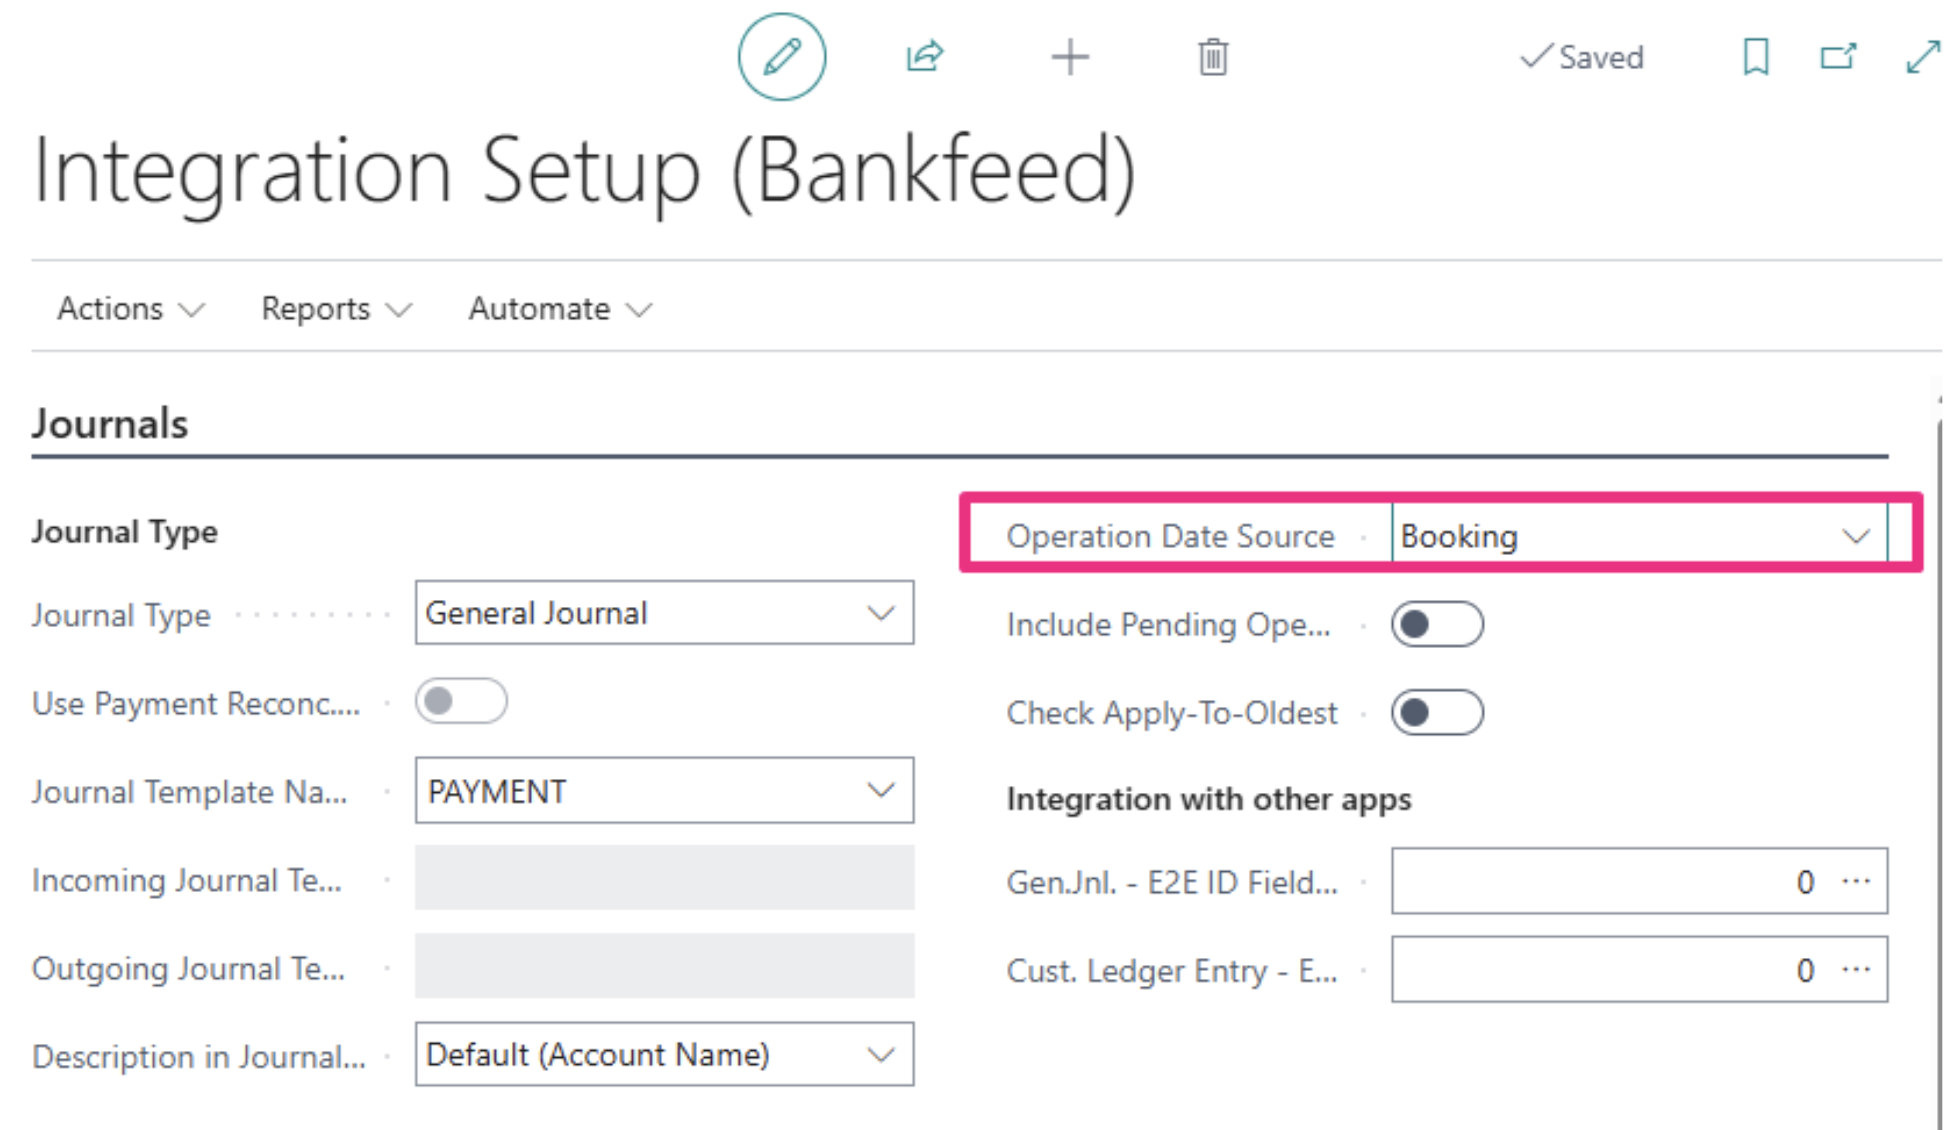
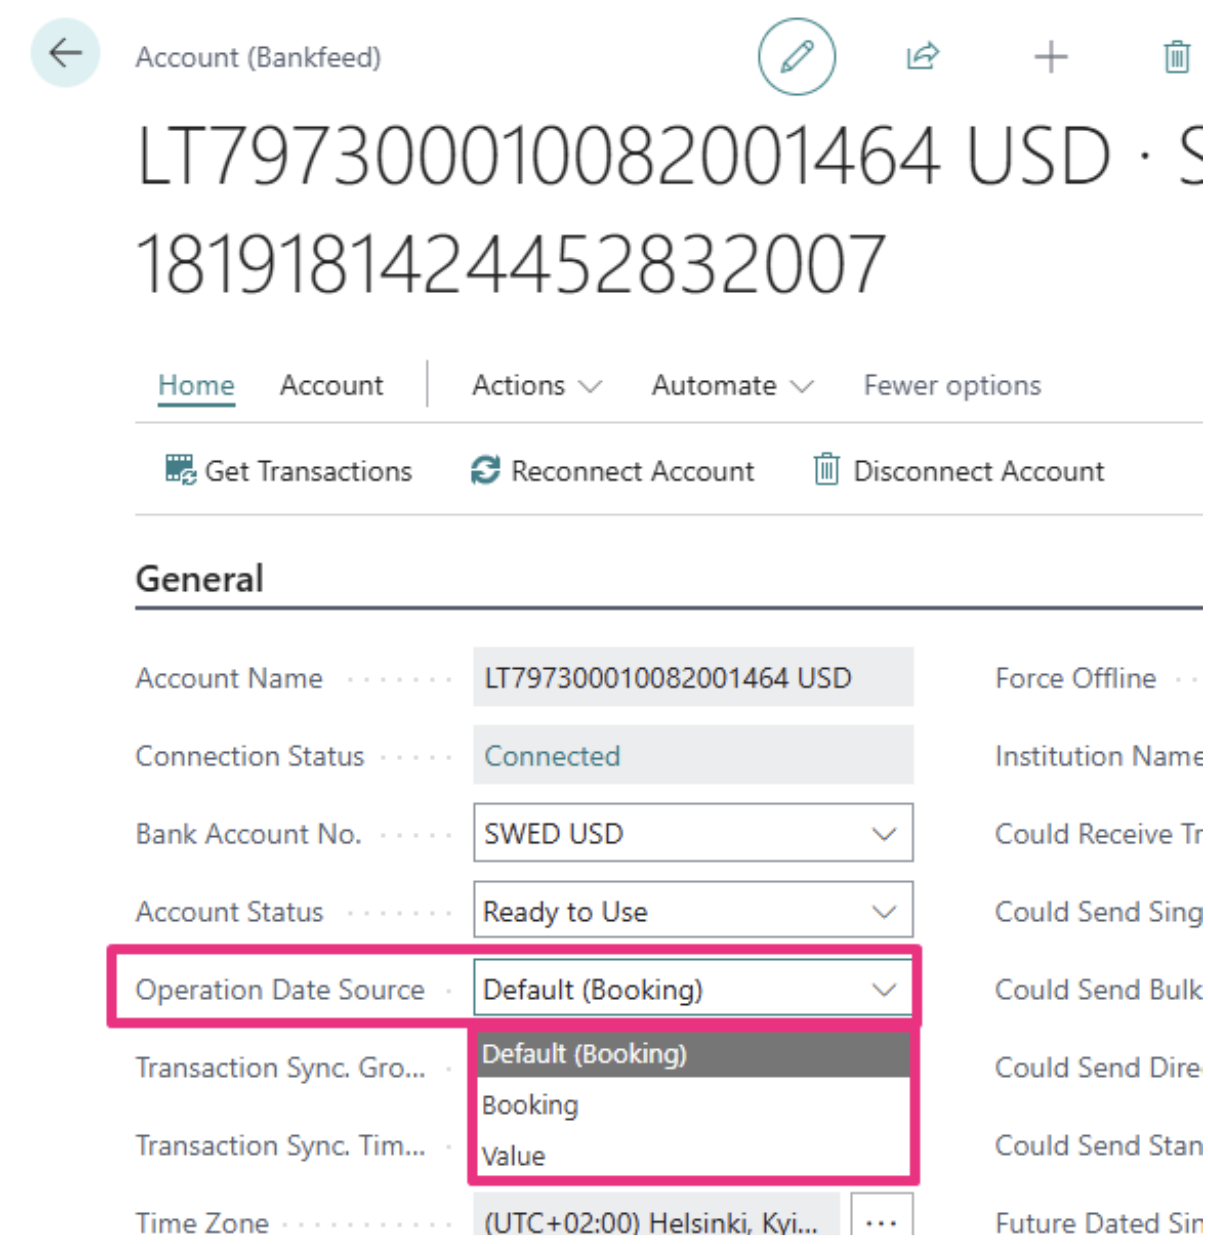
We have now introduced the ability to configure this setup separately for each account, allowing for different handling of Booking and Value dates.
The date to be used is specified in the Account card under the field “Operation Date Source”. By default, this setup is set to “Default (Booking)”.
To see which dates are used in a transaction, you can refer to the Statement Lines in Bankfeed.
In previous versions of Bankfeed, if you connected your bank through Salt Edge and had multiple companies using the same Customer ID (email), you faced issues connecting new company’s accounts without affecting the existing connections for the other companies – entering the Customer ID during the connection process retrieved all existing connections.
Now, when you enter your Customer ID in “Get Started with Bankfeed” setup, you will be creating a new connection, and no existing connections will be uploaded to Business Central. If you want to upload existing connections, use the “Create Connection” function in Connections (Bankfeed).
To create a new connection with an existing Customer ID, follow these steps:
1. Open the Get Started with Bankfeed assisted setup
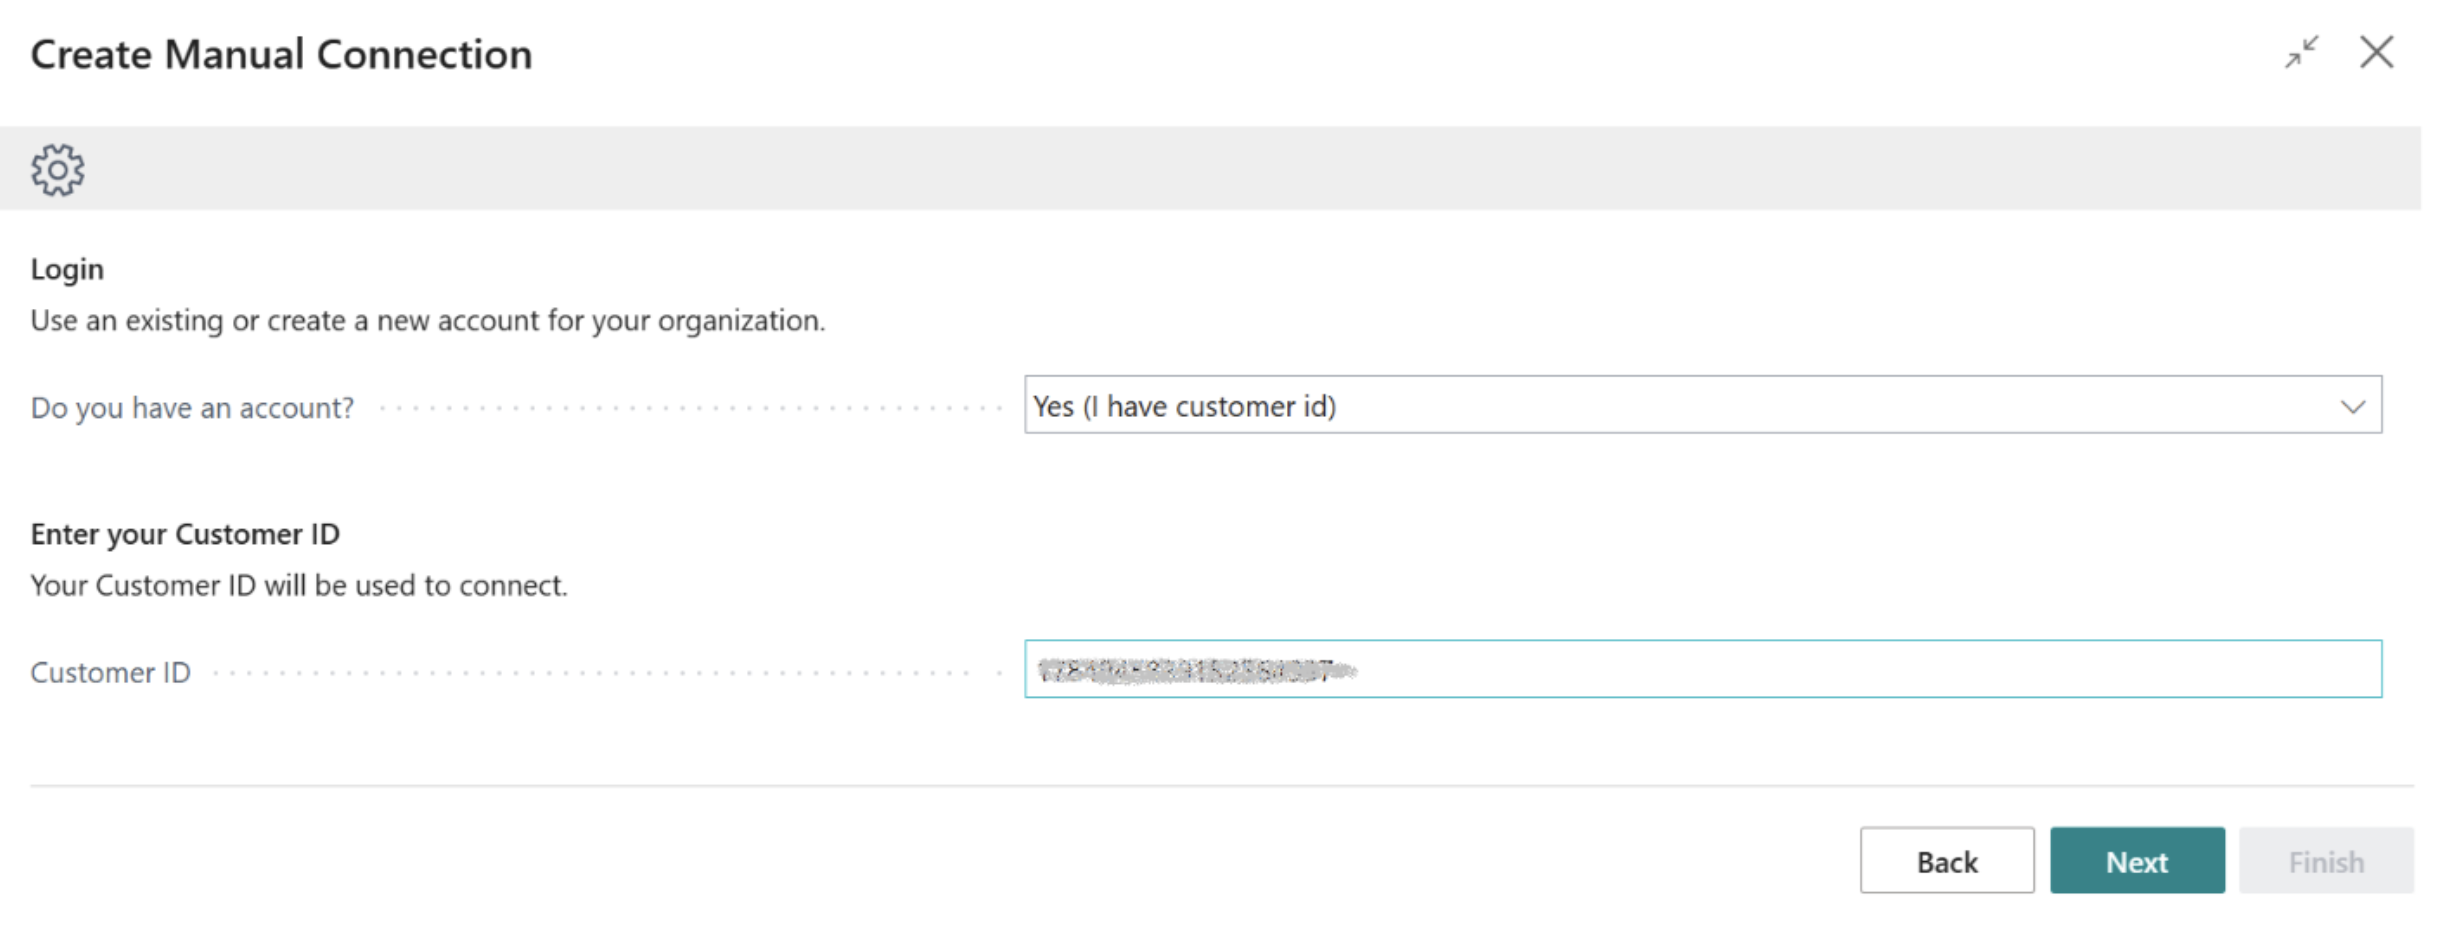
2. Select “Yes (I have customer ID)” in the field “Do you have an account?”
3. Enter your Customer ID in the “Customer ID” field
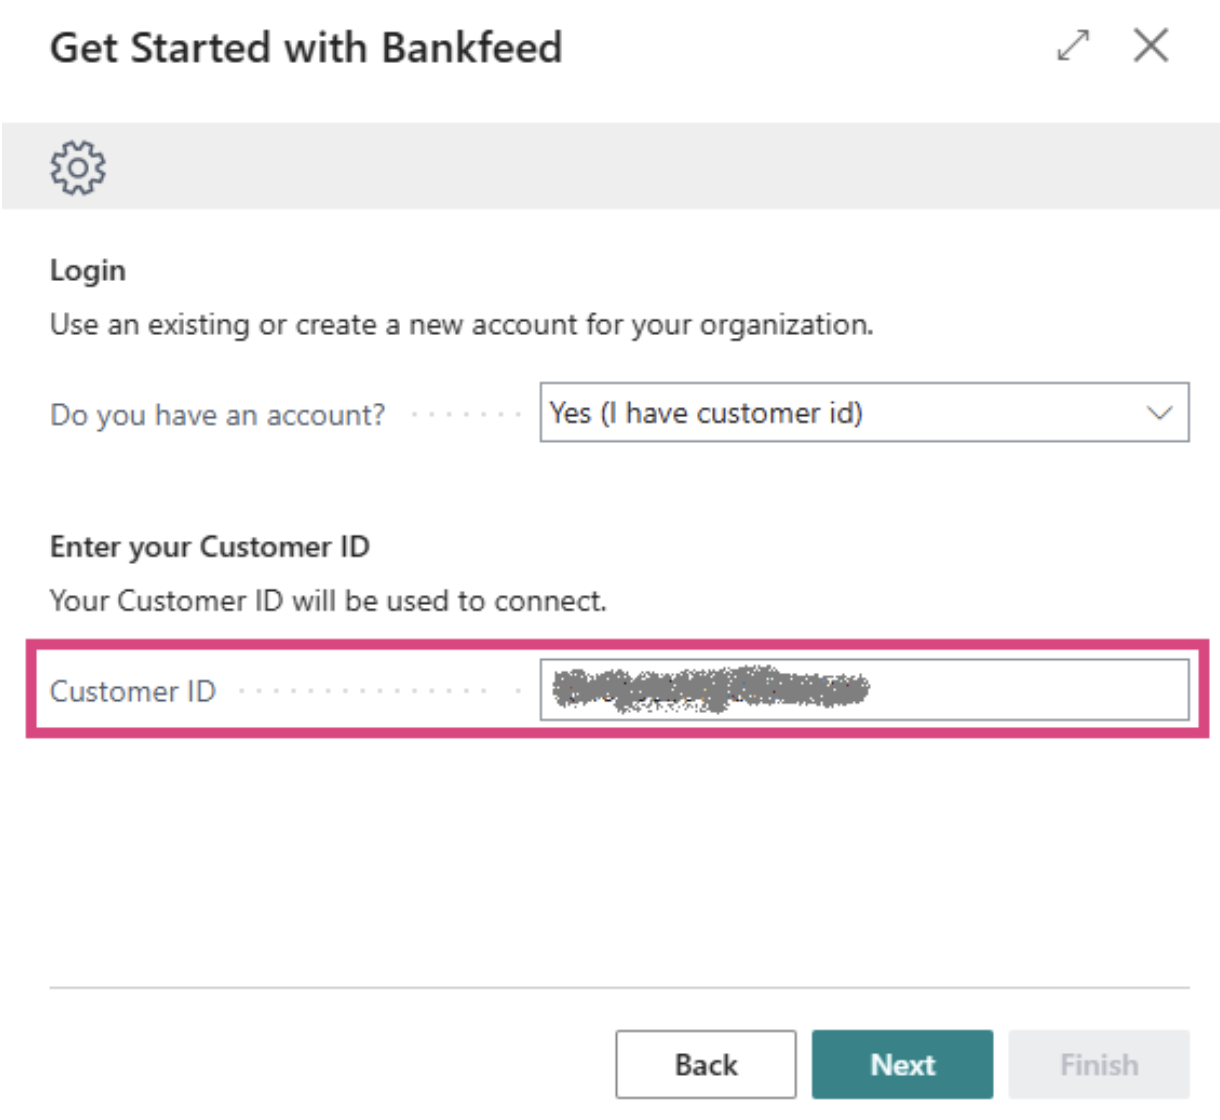
4. Click Next
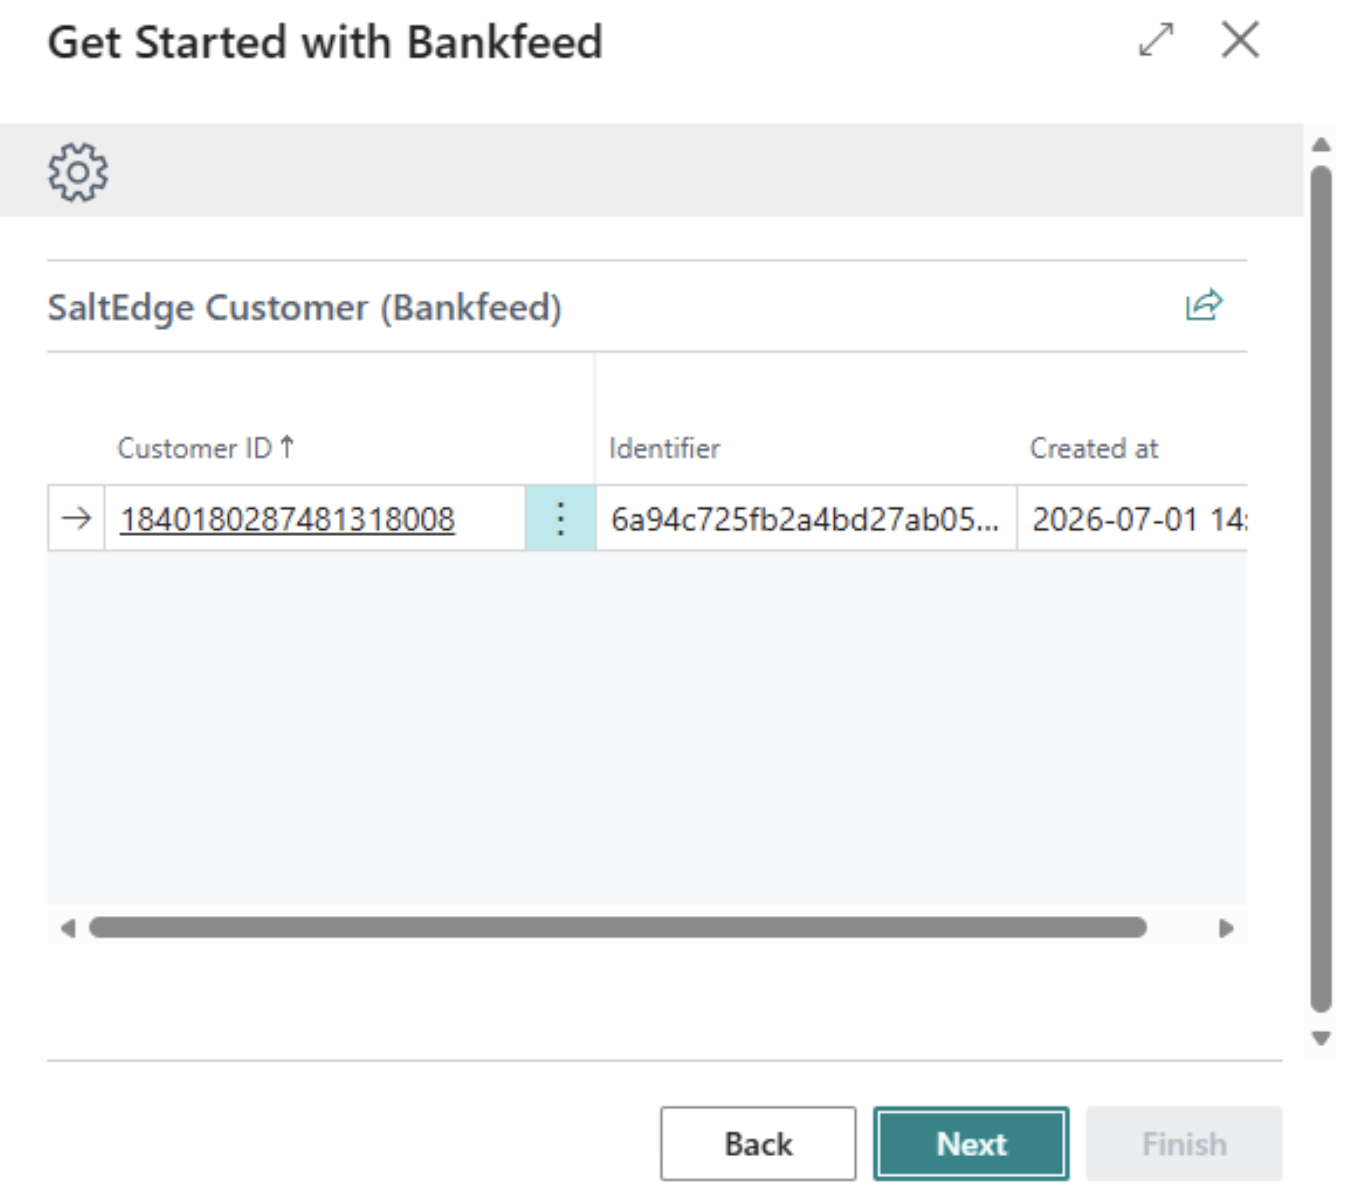
5. Click Next
6. Enter the Start Date and follow the connection process further
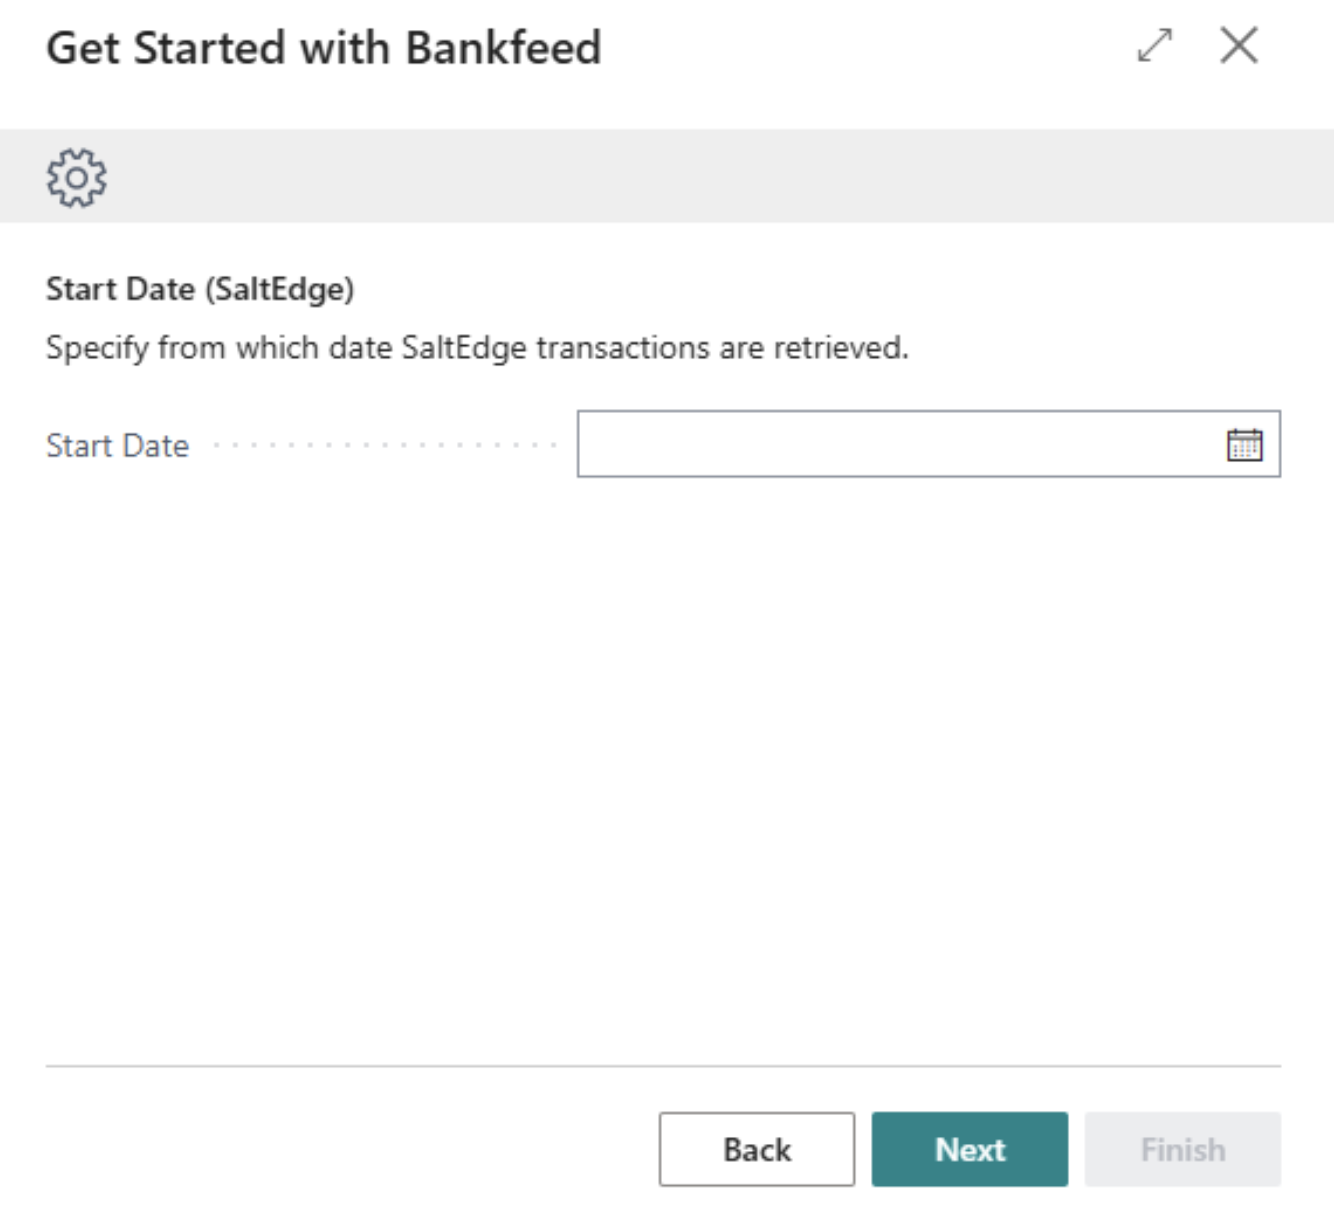
To retrieve existing connections with the “Create Connection” function, follow these steps:
1. Go to Connections (Bankfeed) and click Create Connection
2. Enter your Customer ID and click “Next”
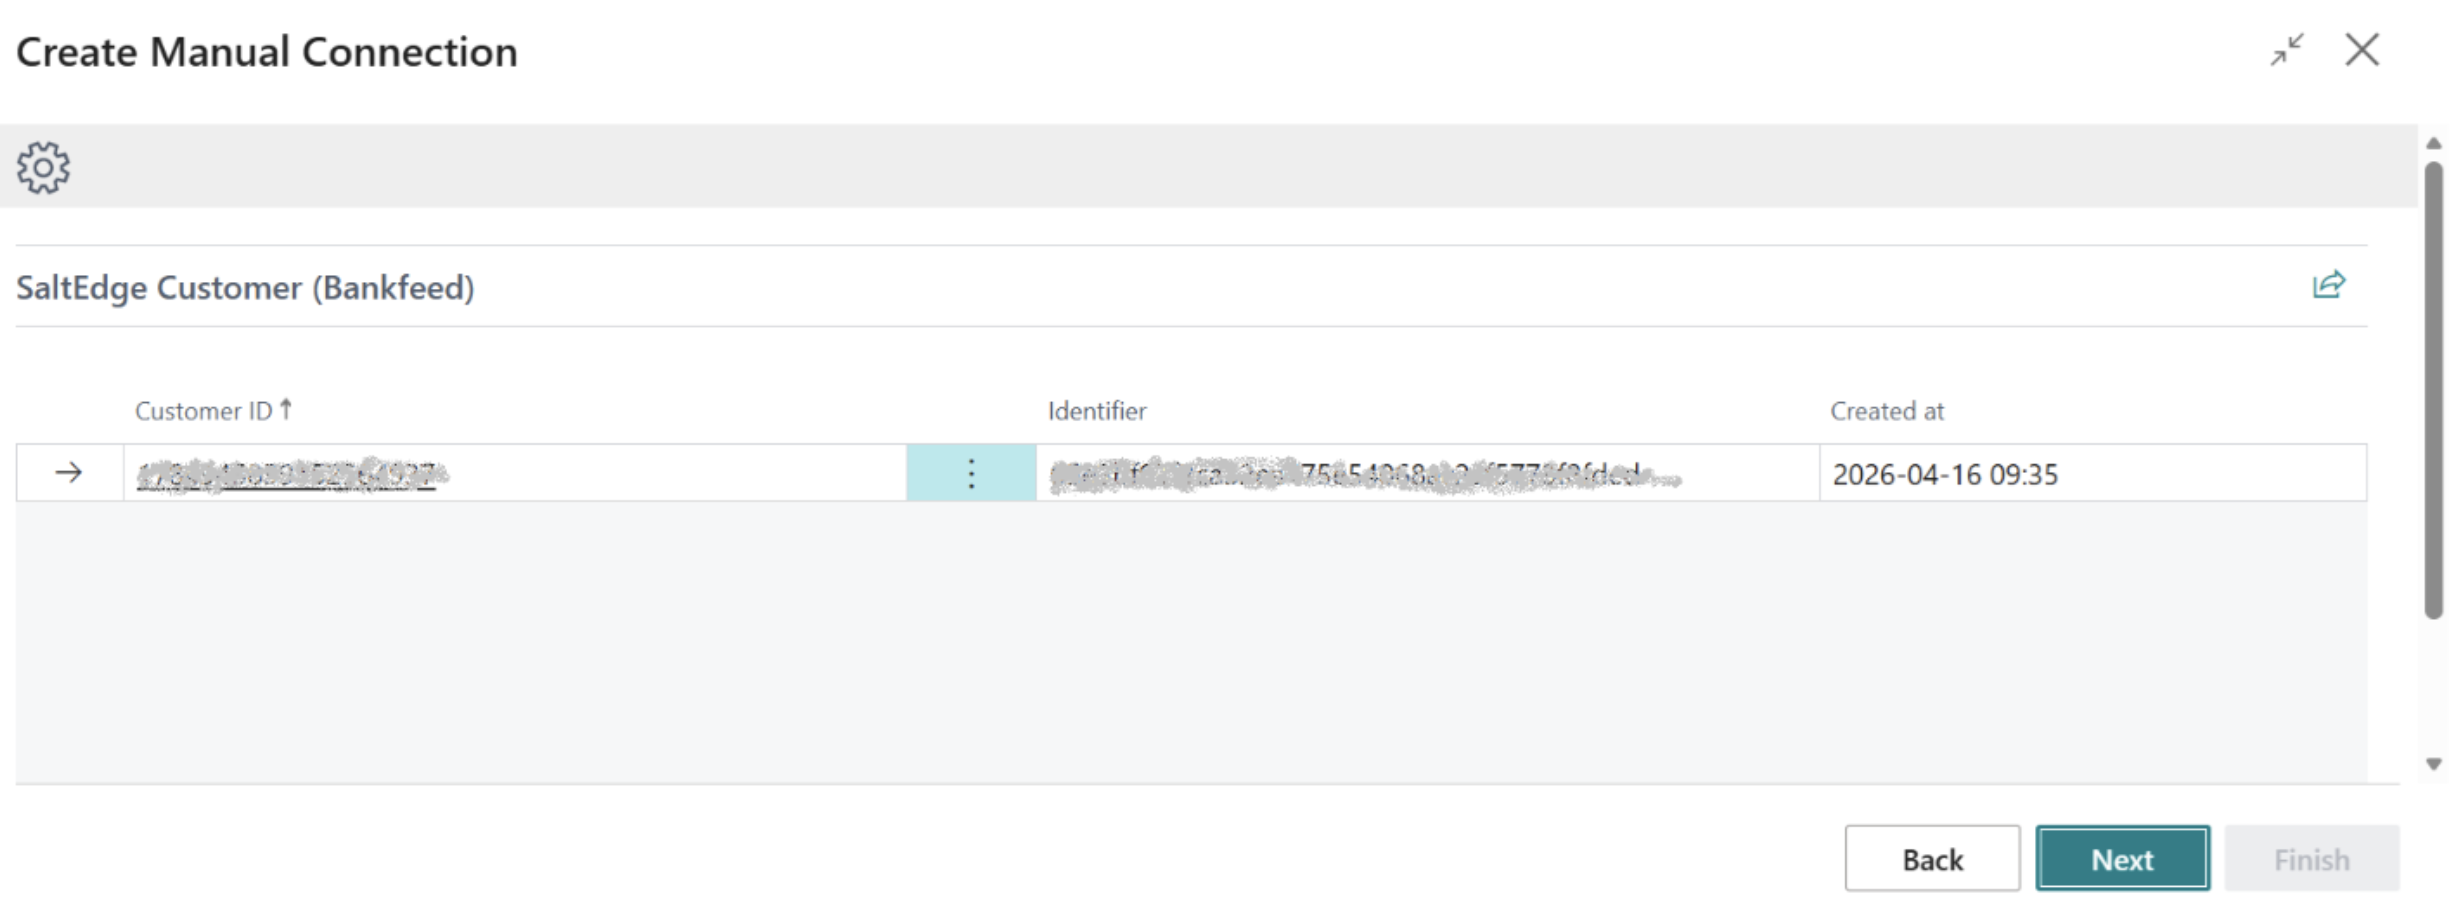
3. Click “Next” again
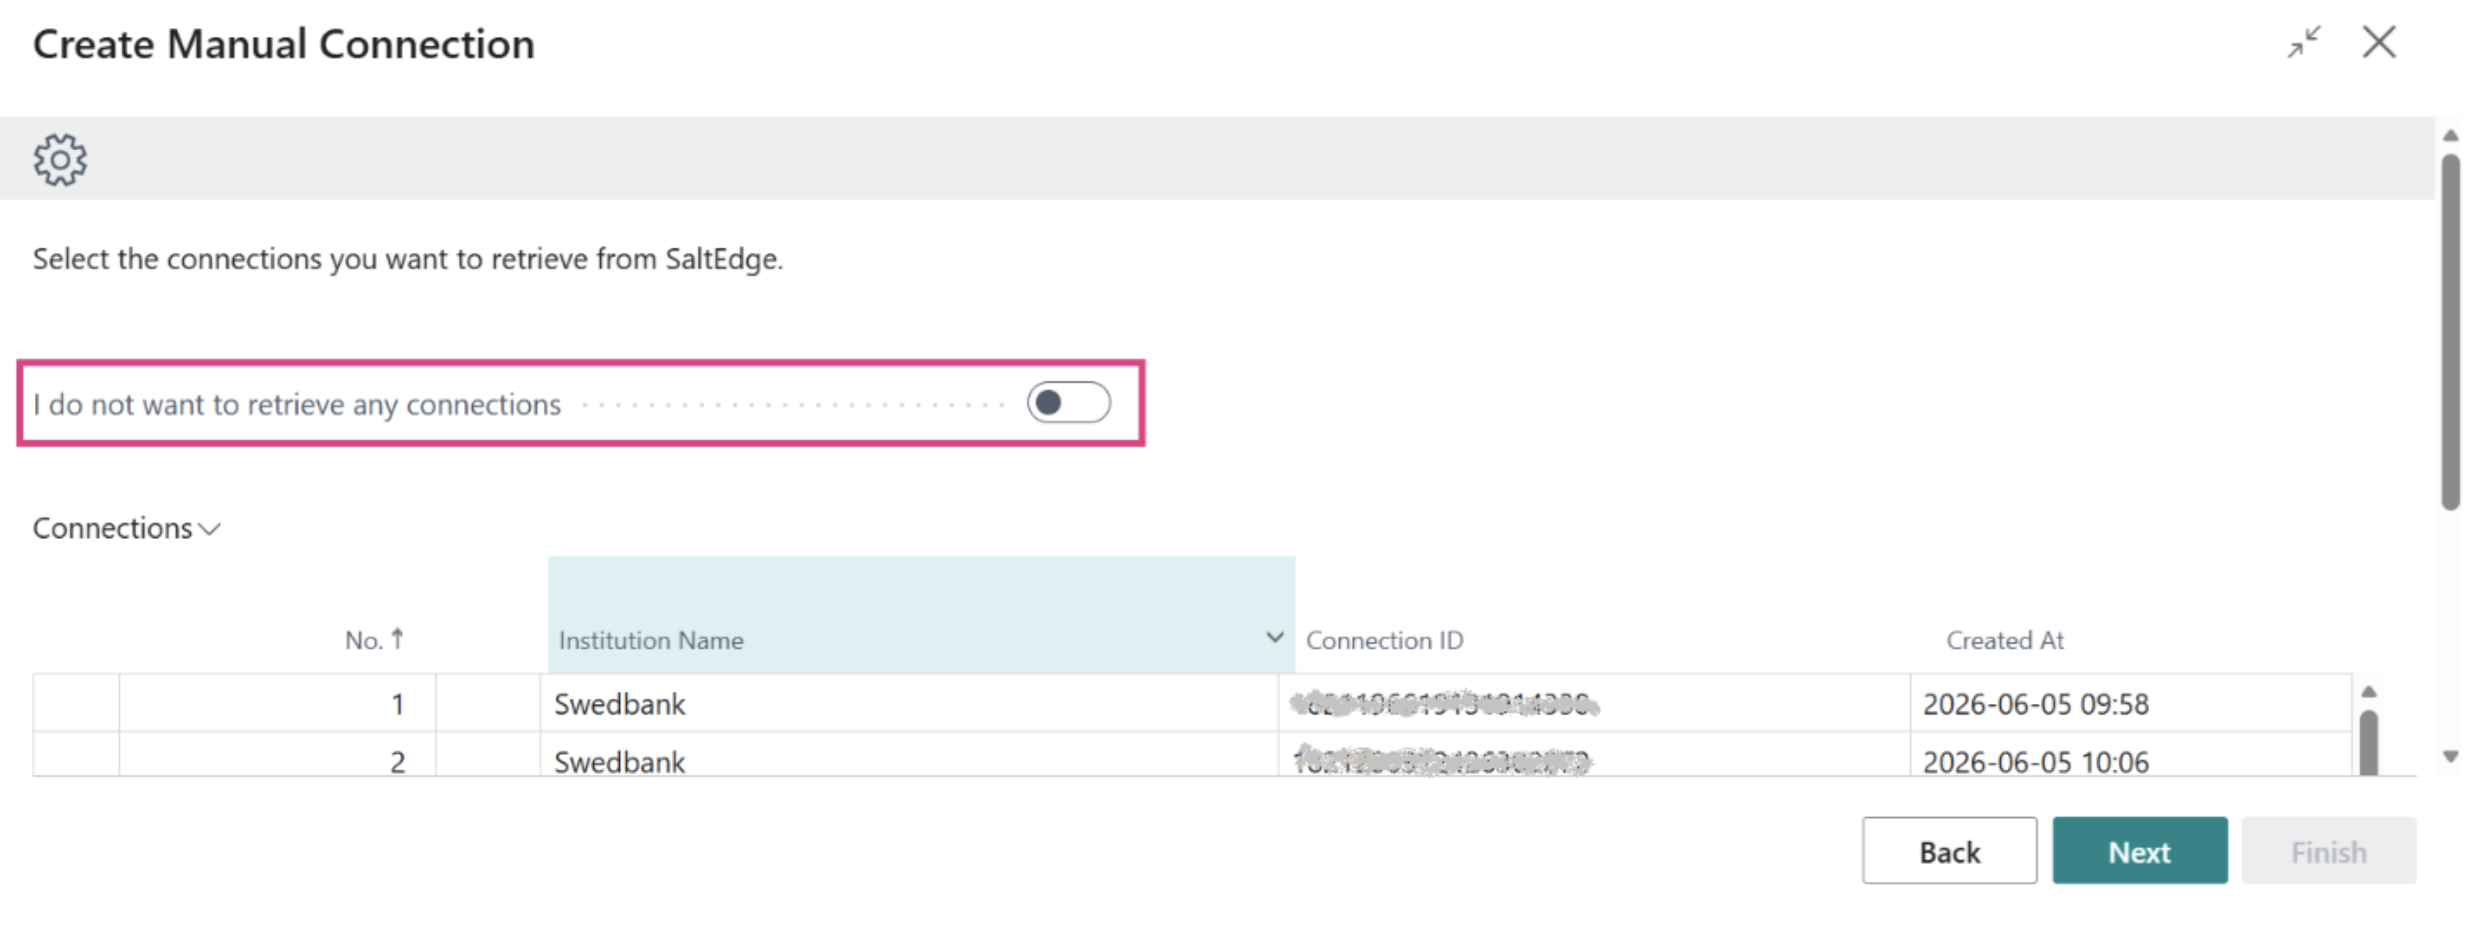
4. Select the connections you want to add, or choose “I do not want to retrieve any connections” if you only want to create a new connection without adding any existing ones
TRY FOR FREE

HURRAY!
Feel free to leave your question here and we will email you the answer as soon as possible.
Hello, I found this Dynamics 365 Business Central add-on that would save me tons of time by automatically importing bank statements and matching payments with invoices. It has certain technical requirements like an up-to-date Business Central version and banks that comply with the PSD2 open banking protocol. Could you please check the requirements and let me know if we are able to use the Bankfeed app? The requirements are here: www.bankfeed.com/faq/, or you may contact the add-on’s developers at [email protected].
Bankfeed works as an add-on for Microsoft Dynamics 365 Business Central. Therefore the usage of this ERP system is necessary. The solution works best with the three latest versions of Business Central. Before installing Bankfeed, we recommend checking if the following conditions are met: 1. Open banking API (PSD2) is not occupied. If you use online payment provider services (Wordline, Wordpay, etc.), they might be connected through an open banking API. Therefore, Bankfeed will not be able to connect to this API as it is already occupied. In these situations, we can connect Bankfeed through the bank’s direct API, known as a Gateway. However, it usually requires additional banking fees and additional implementation hours. 2. Banks provide the information required for recognition and reconciliation. Even though open banking is regulated using the PSD2 protocol and is mandatory for all EU banks, the banks treat these requirements differently. The amount of information provided through the APIs and its quality can differ depending on the bank. This can lead to a situation where Bankfeed will not be able to properly identify customers/vendors or documents because of the lack of data. Here is a list of mandatory bank fields needed to enable Bankfeed’s payment recognition and reconciliation. Please check HERE if the banks you are using provide the information from these fields:
Enter your email, and you will immediately receive:
Enter your email, and you will immediately receive:
Enter your information, and you will be contacted regarding a pricing offer that suits your business needs.