
An update has been released, and here is an overview of what was improved in Bankfeed version 25.0.
Contact us
Feel free to leave your question here and we will email you the answer as soon as possible.


An update has been released, and here is an overview of what was improved in Bankfeed version 25.0.
Check out the features of Bankfeed.
Feel free to watch a quick demo to see all the updates in action, or if you prefer to read through the details, we’ve got a comprehensive breakdown waiting for you below.
In cases where different employees work with bank transactions, splitting imported bank transactions into different General Journal templates could be helpful. For example, incoming payments (credits) would go to the Cash Receipt journals and outgoing payments (debits) to the Payment journals.
This new feature can be used by selecting the new Journal Type – General Journal split by Credit/Debit in the Bankfeed’s “Get Started with Bankfeed” assisted setup.
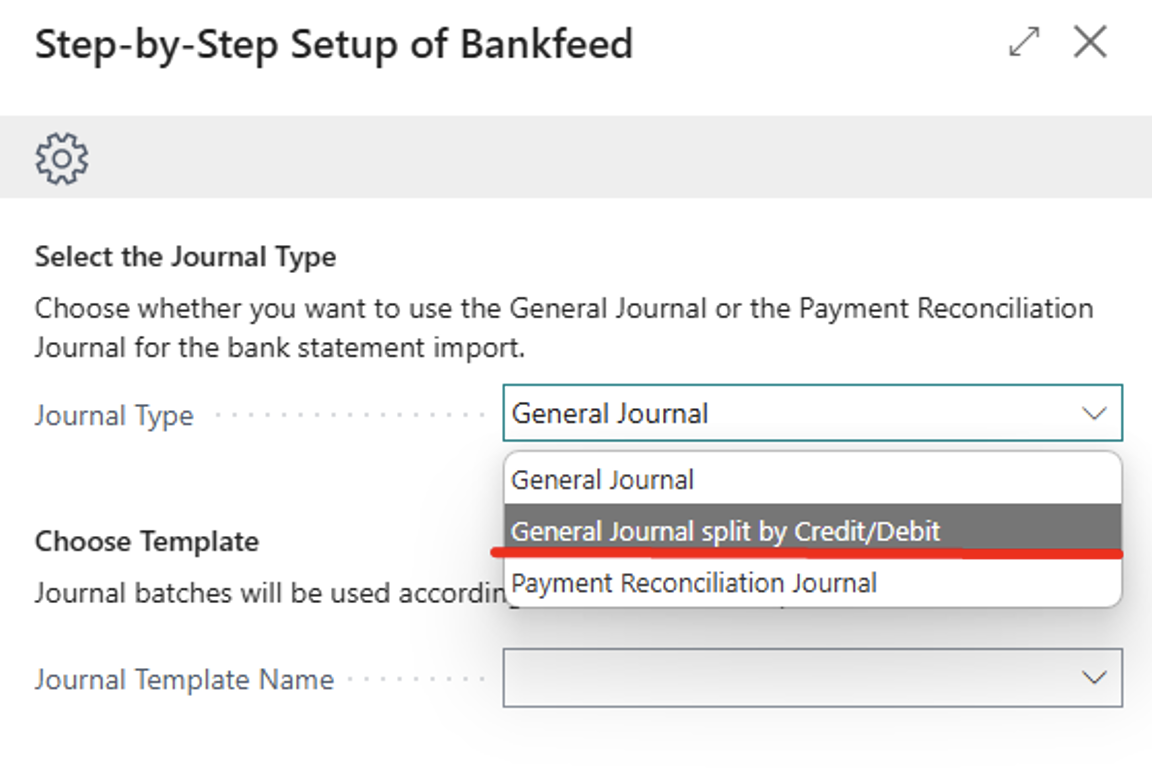
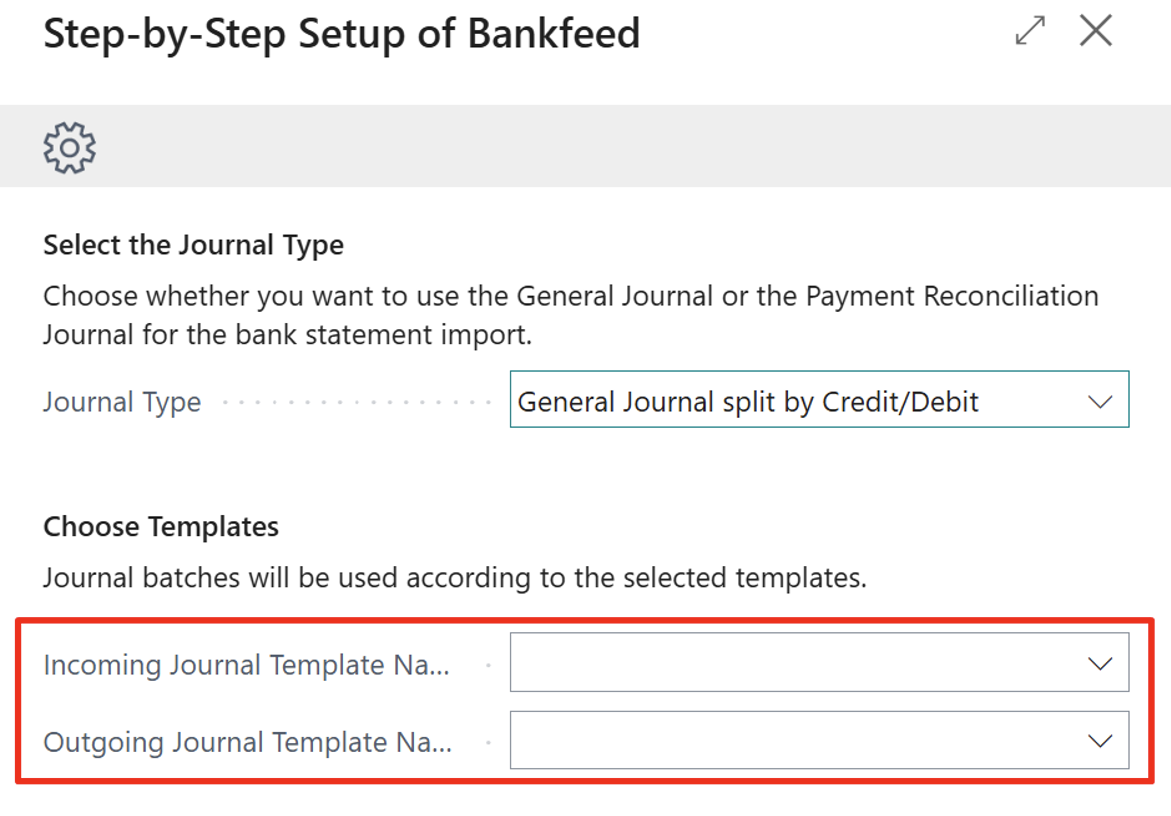
When this setup is selected, Bankfeed journal lines look like this:
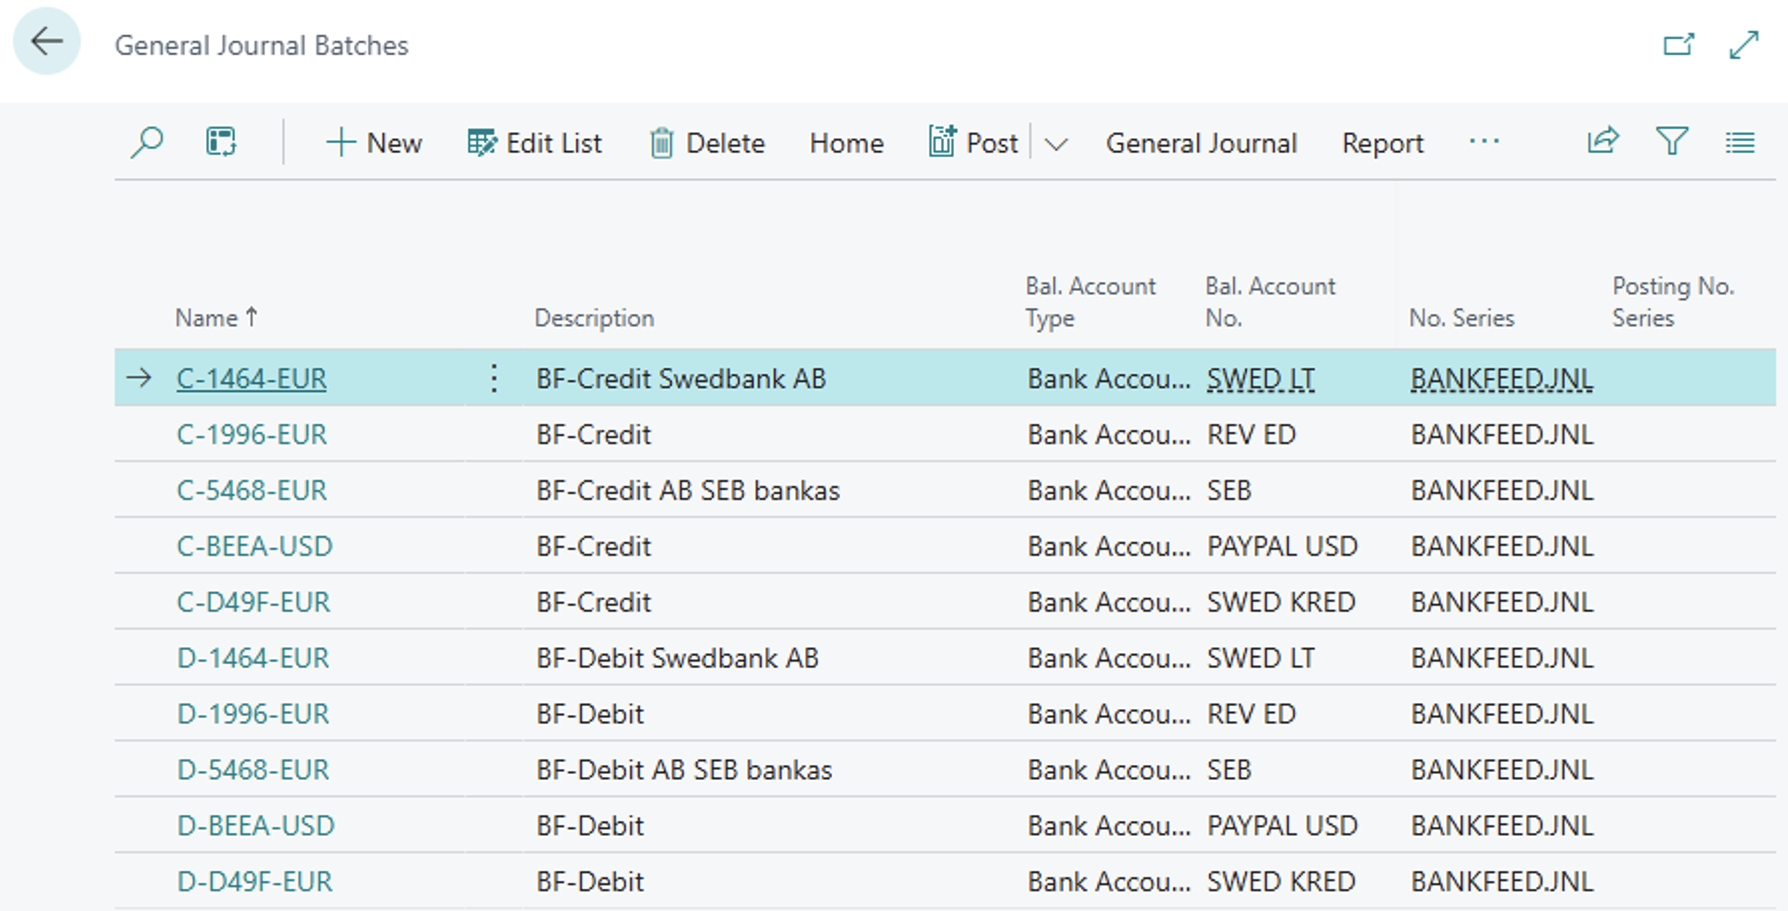
If you are a Bankfeed user and want to switch the Journal Type from “General Journal” to “General Journal split by Credit/Debit”, change this setup in the “Integration Setup (Bankfeed)” page.
Follow these steps:
1. Post all existing Bankfeed journal lines or delete them from the journal batches
2. Delete Journal Batches, which have a “Bankfeed” checkmark
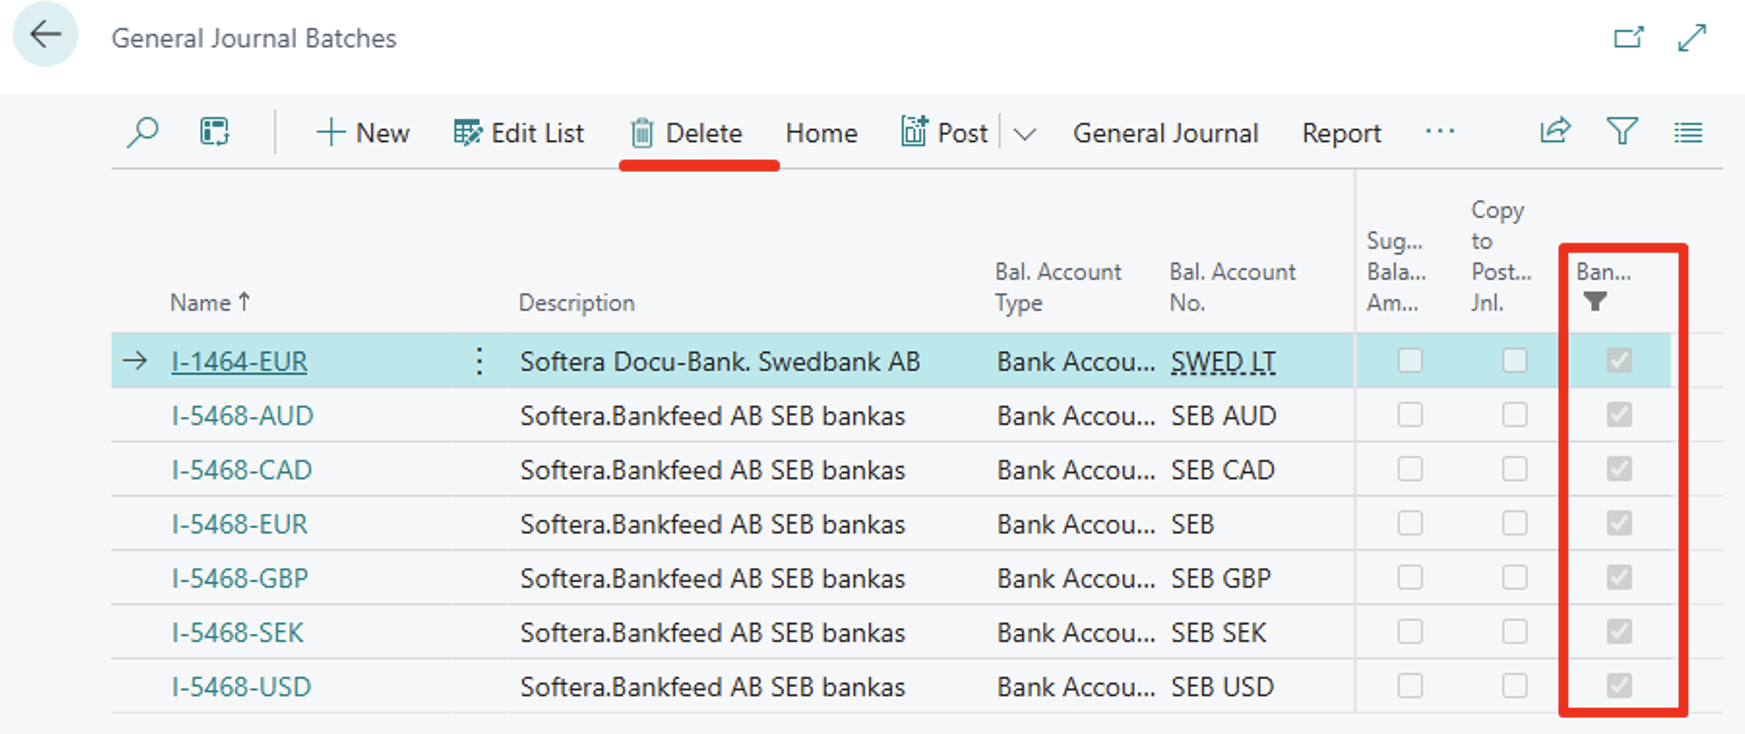
3. Open Integration Setup (Bankfeed)
4. Change the Journal Type to “General Journal split by Credit/Debit” and select journal templates in the fields “Incoming Transactions Journal Template Name”/” Outgoing Transactions Journal Template Name”
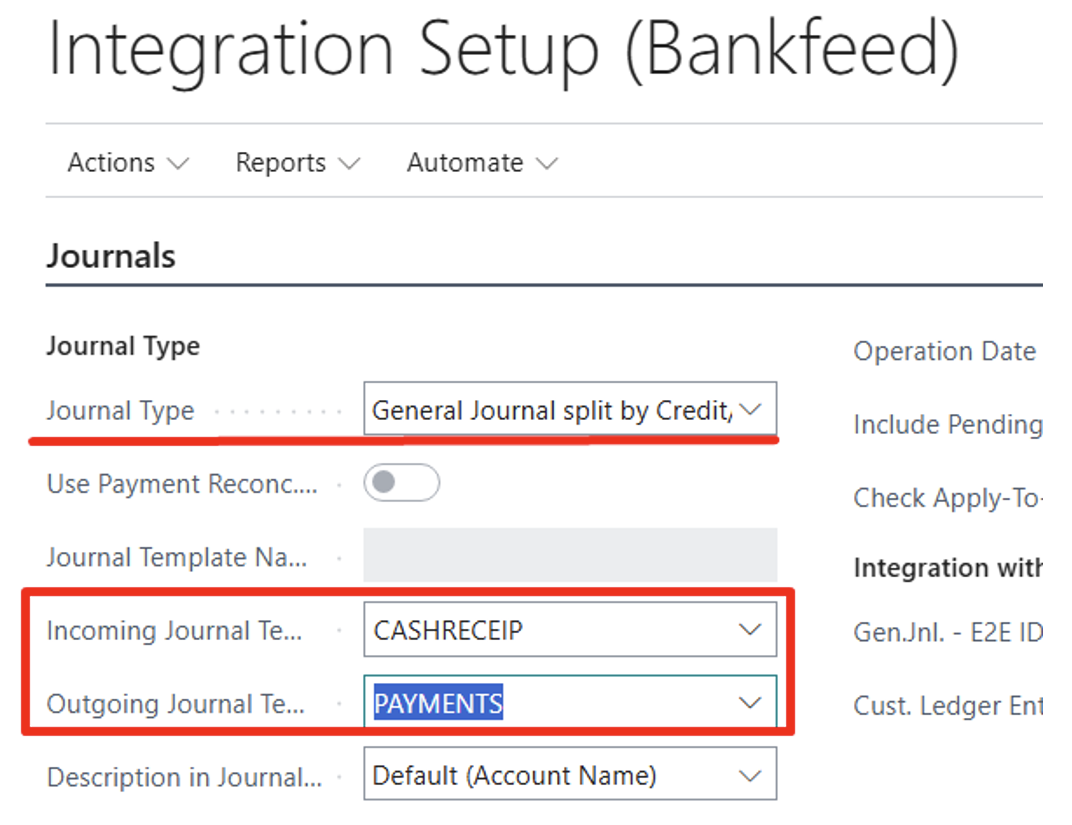
5. Generate Journal lines by running the function Get Transactions. New journal batches will be created, and journal lines split.
When we introduced the ability to add default dimensions to “Text to Account Mapping (Bankfeed)” our users were enthusiastic. However, as we grew the customer range, we soon realized that this functionality must follow the fundamental Dynamics 365 Business Central functionality. So, we redesigned it to meet Business Central’s best practices.
In this release, dimensions assigned to specific “Text to Account Mapping” cases can be combined with the standard dimensions’ functionality, including “Dimension priorities”. This allows for the combination of dimension values coming from different sources and the orchestration of predefined rules.
If you want to enable the new dimension functionality in the “Text to Account Mapping (Bankfeed)”, open the page and click Actions > Migrate Dimensions to Default Dimensions.
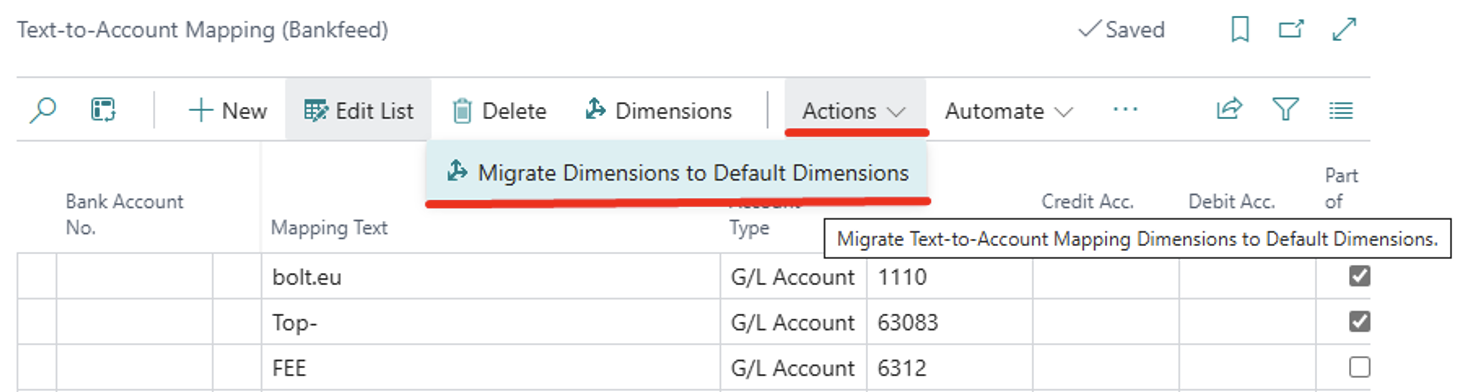
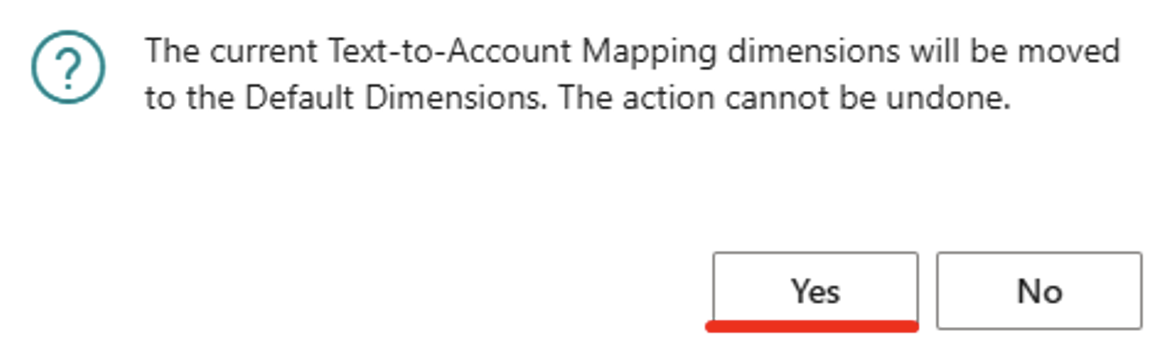
There is no need to do anything else – the new functionality will start running.
Note: if you are satisfied with the existing functionality, you can stick to it because it will also be available. But if you want to use “Dimension priorities” or other standard dimensions’ functionality, proceed with the actions written above.
We know our Bankfeed customers love Text to Account Mapping, because it’s easy to set up and understand. But sometimes it’s just not enough. Sometimes we come across situations where setting up one word for recognition is insufficient, and we need many more conditions to recognize and specify the lines better. For this purpose, we introduced formulas in the Text to Account Mapping functionality. It will allow you to have many more variations in texts and setups.
You can still use the same functionality as before and enter only one word for recognition, but in cases where that’s not enough, you can add formulas.
To better understand the improvements, let’s analyze one example.
Let’s assume that our bank transactions contain many different “Charges,” and only some specific symbols result in the correct G/L account that should be assigned to that line.
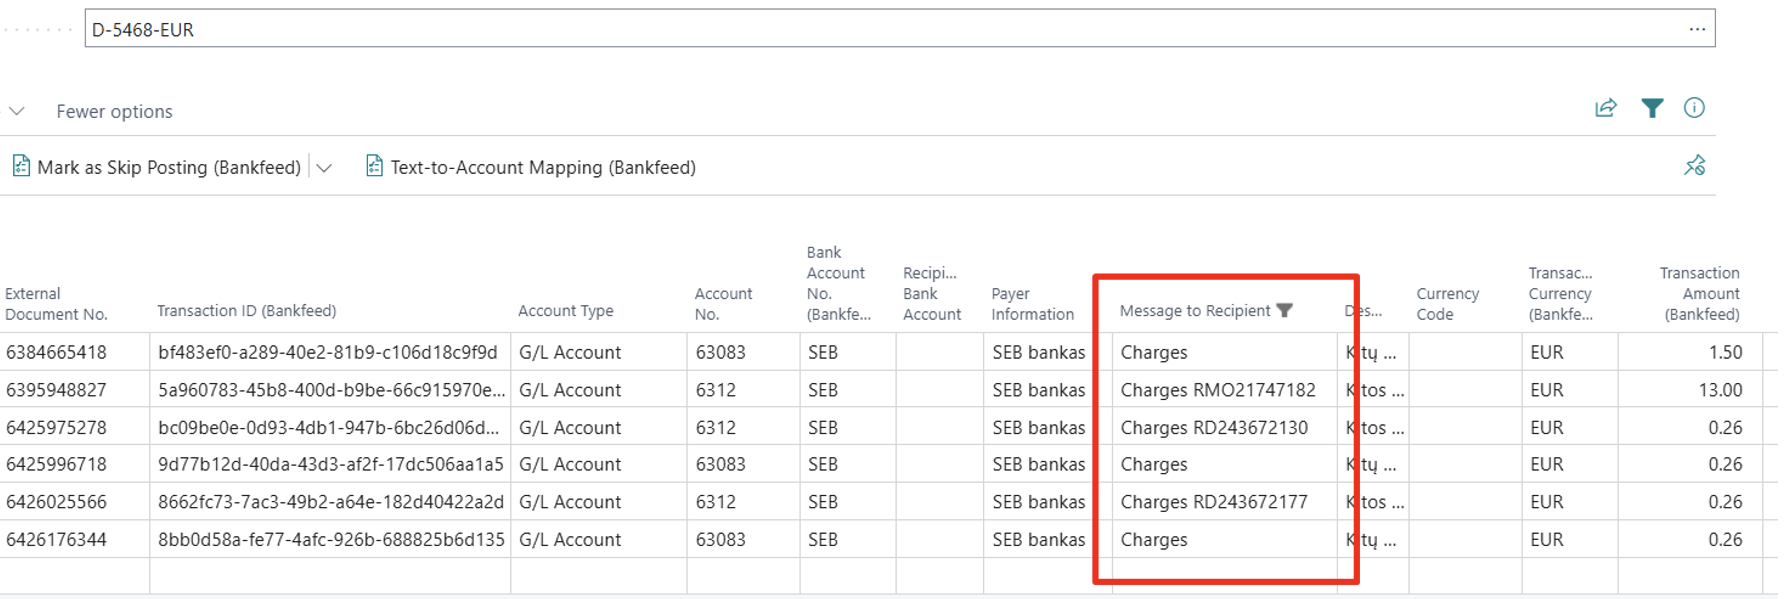
In this example, we have such conditions:
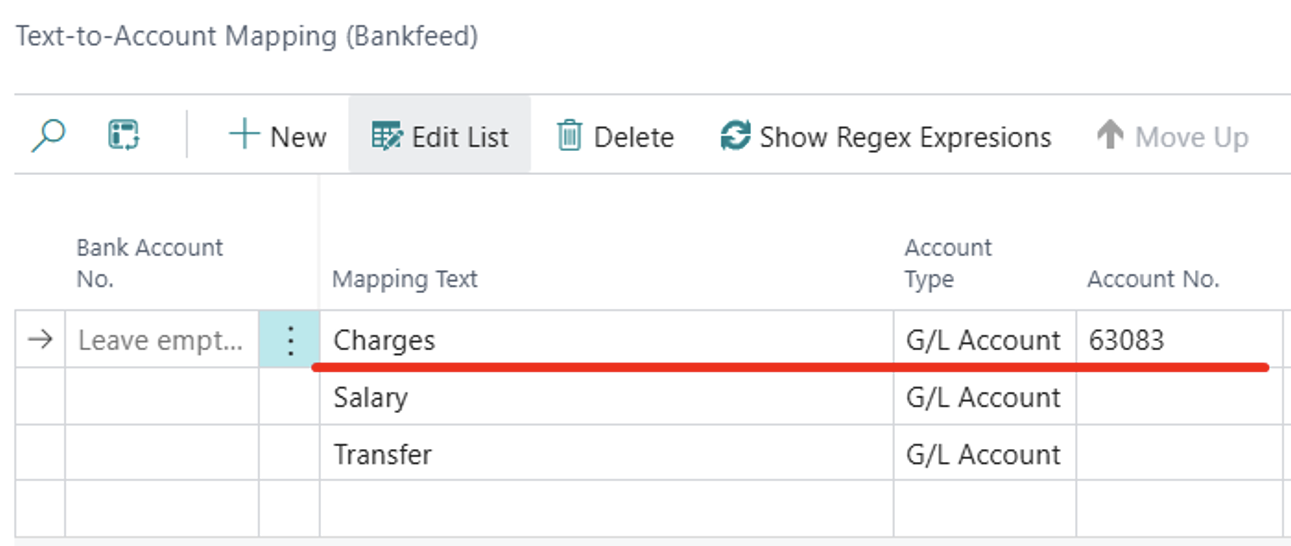
1. If the text in the “Message to Recipient” is “Charges,” we must assign G/L Account 63083
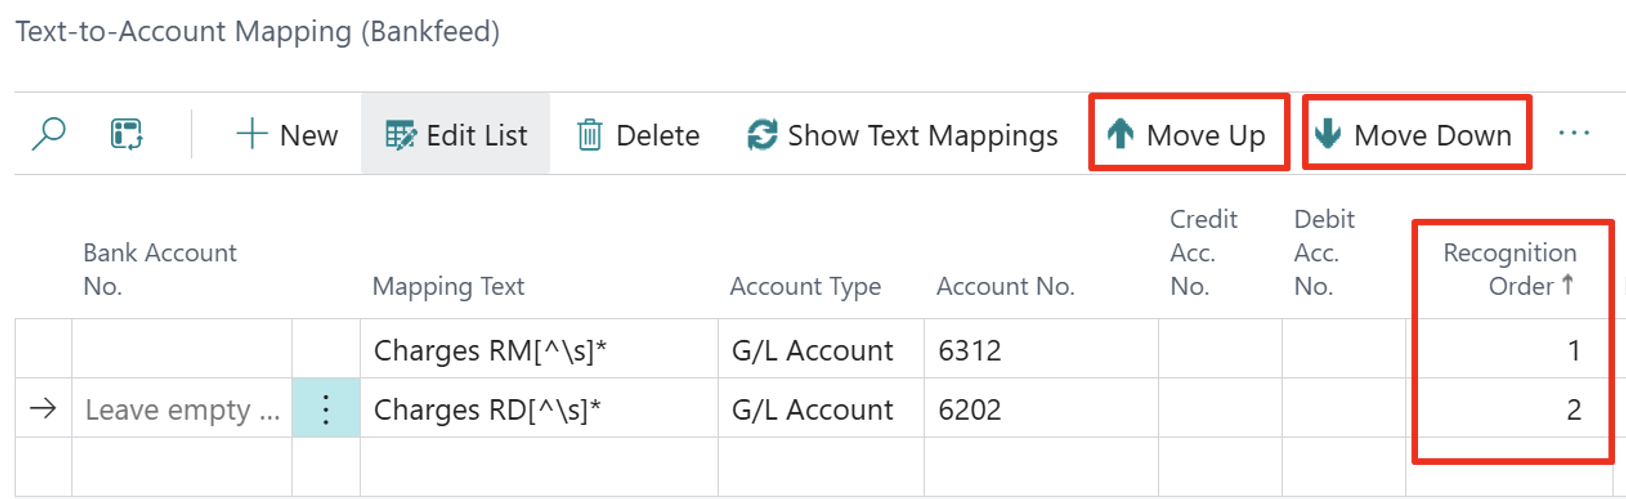
2. If the text in the “Message to Recipient” is “Charges RM……”, we must assign G/L Account 6312
3. If the text in the “Message to Recipient” is “Charges RD…”, we must assign G/L Account 6202
To fulfill these conditions, we should use formulas and the old Text to Account Mapping functionality.
For the first condition, the setup will look like this:
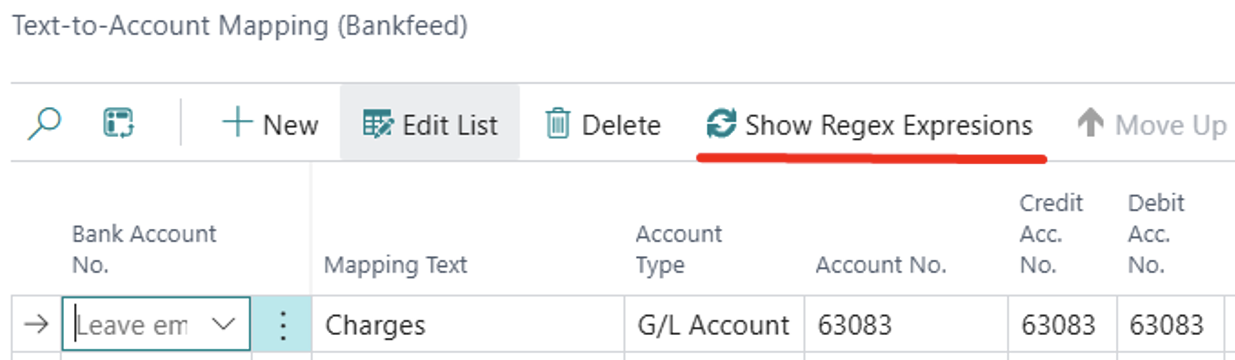
For the second condition, we need to enter a formula, so click “Show Regex Expressions” and enter the formula:
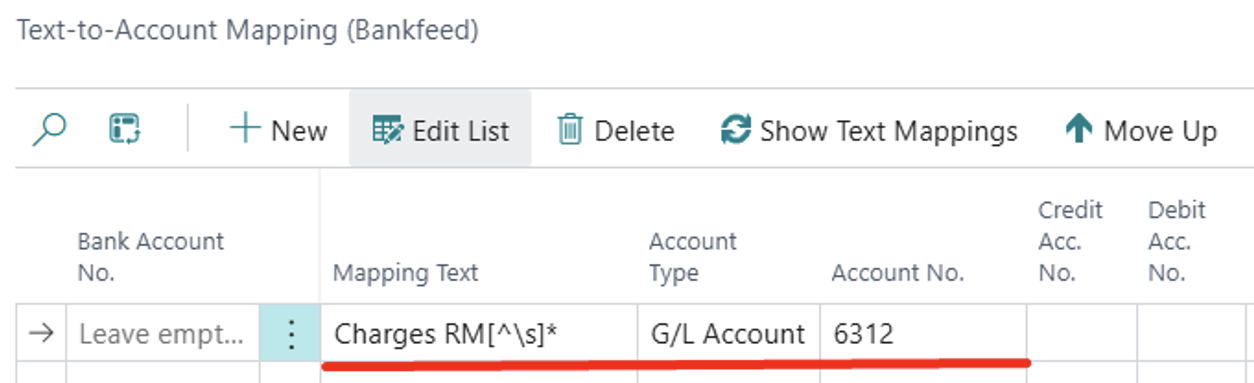
We must enter another formula for the third condition in “Show Regex Expressions”.
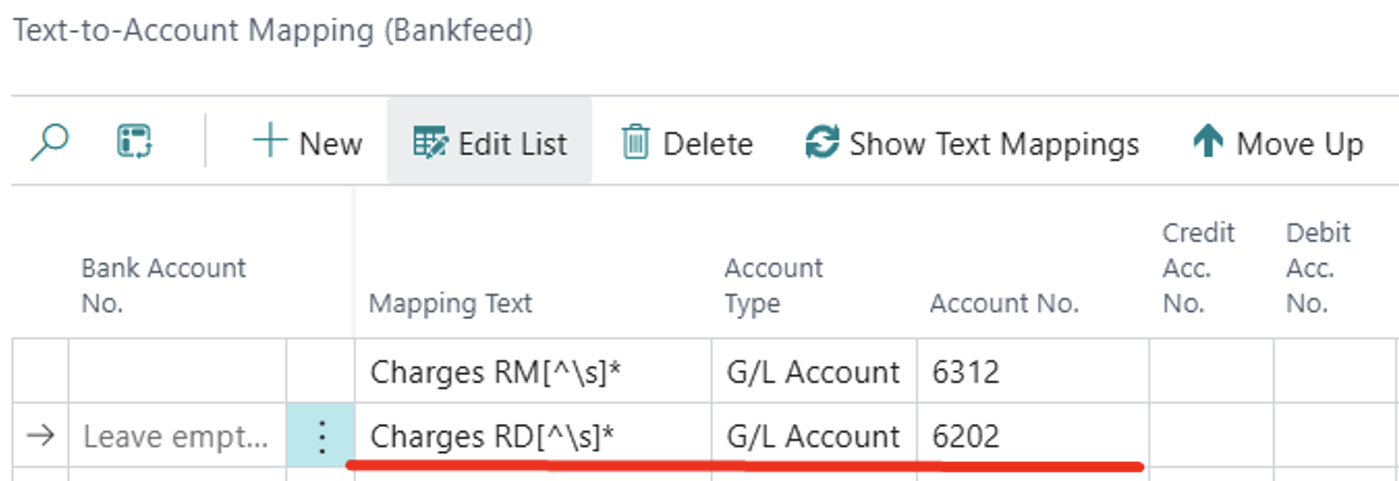
If you use more than one formula, you can also rearrange the order in which formulas will be applied by changing the “Recognition Order”.
Sometimes, when we do not have specific rules for skipping bank transactions, it’s easier to do it in the Journal. This release offers such a possibility.
If you have a Journal line that needs to be skipped from posting, you can now just click Home > Mark as Skip Posting (Bankfeed).
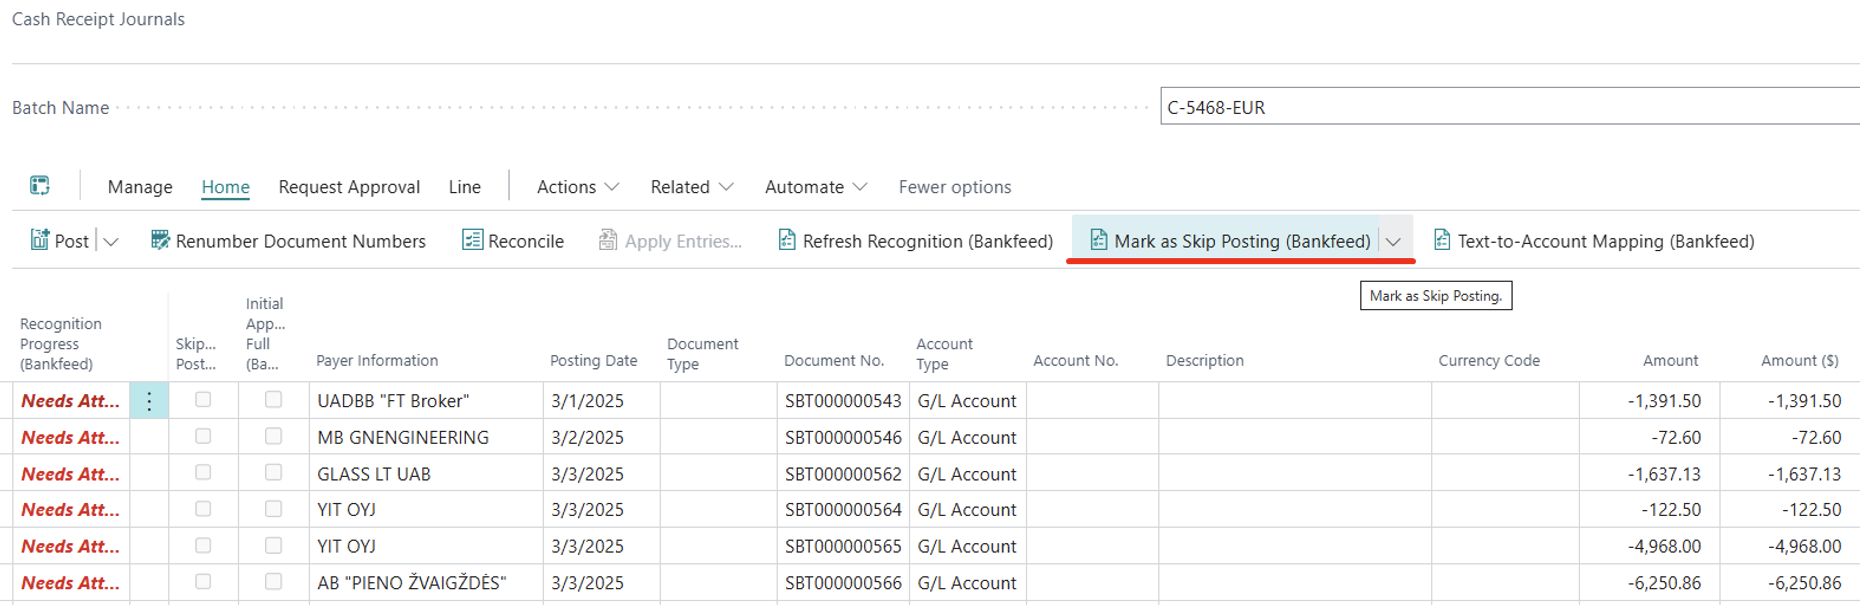
You can select more than one line for marking.
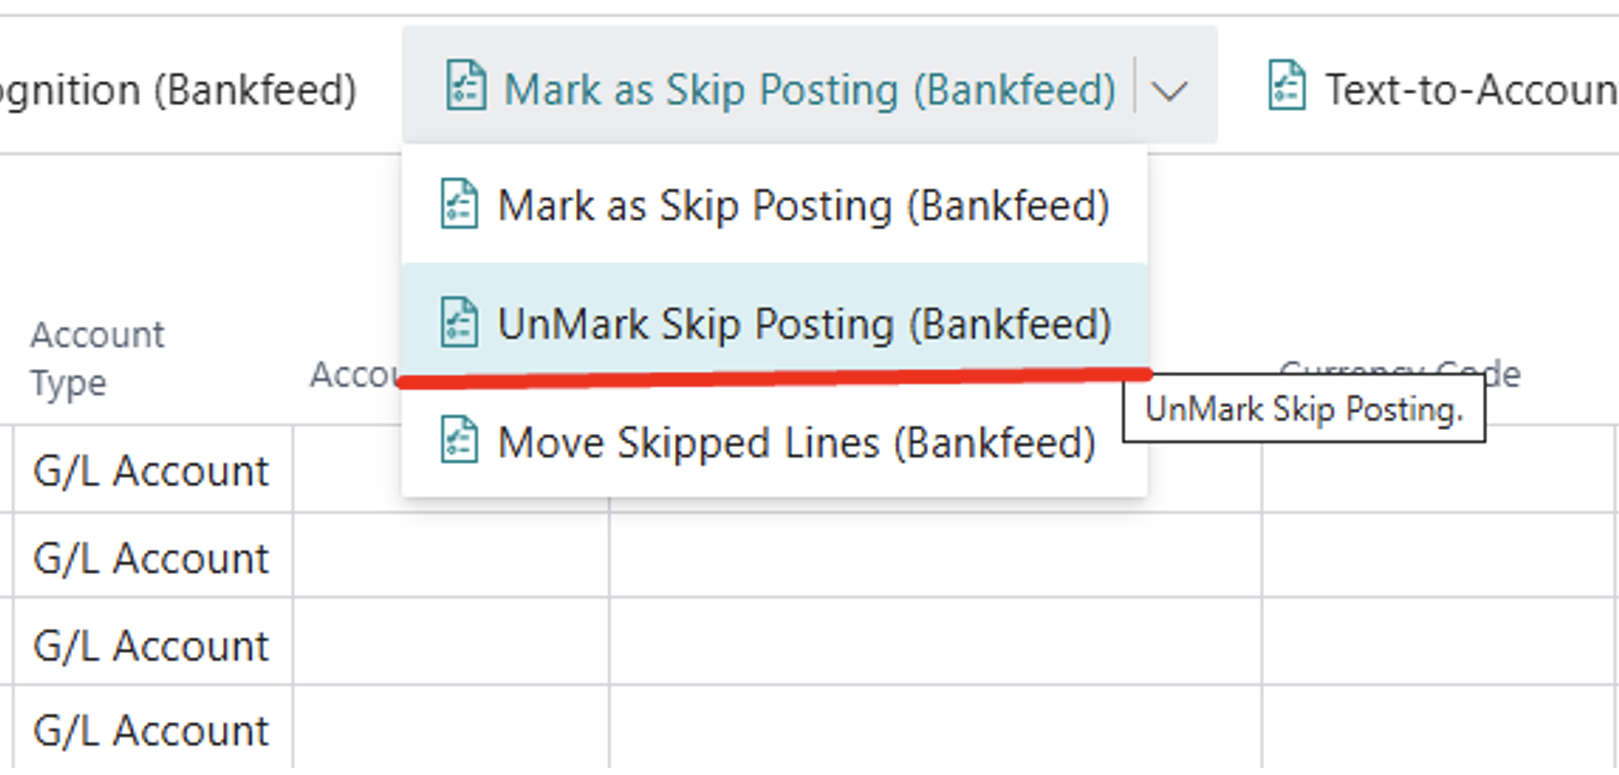
Here, you will also find a function for Unmarking the lines.
Don’t forget to use the function “Move Skipped Lines (Bankfeed)” so that the skipped lines would be removed from the Journal and added to the Posted Statement lines.
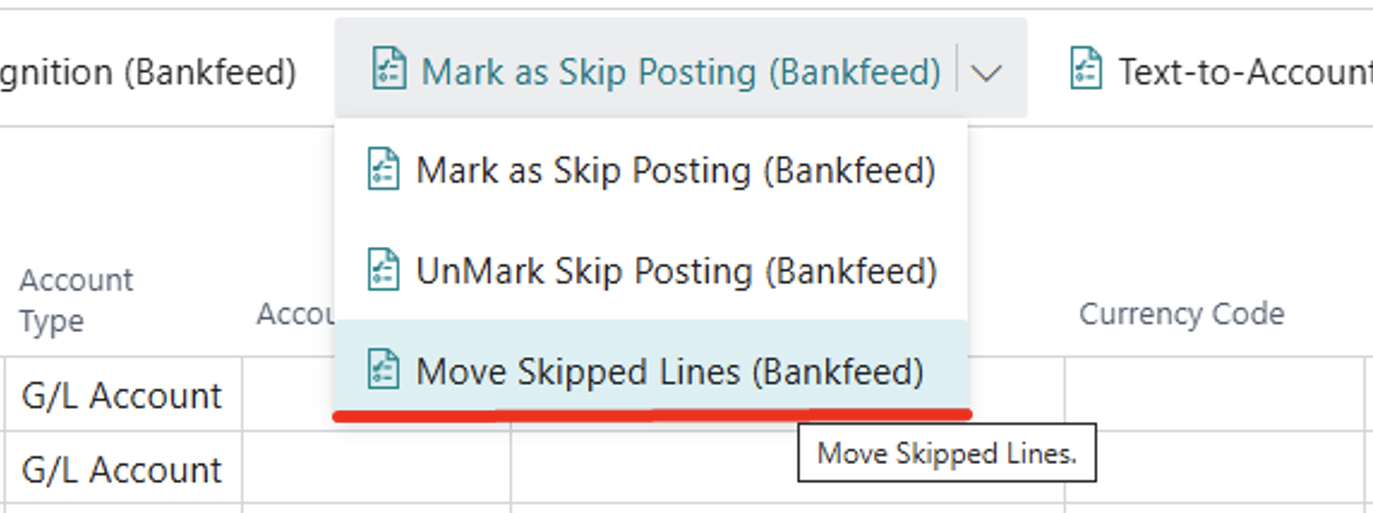
If the lines aren’t moved from the Journal, they will be posted as regular Journal entries.
In previous Bankfeed versions, if a user did not have a SUPER Permission Set, they needed to have three Permission Sets assigned to them to use Bankfeed.
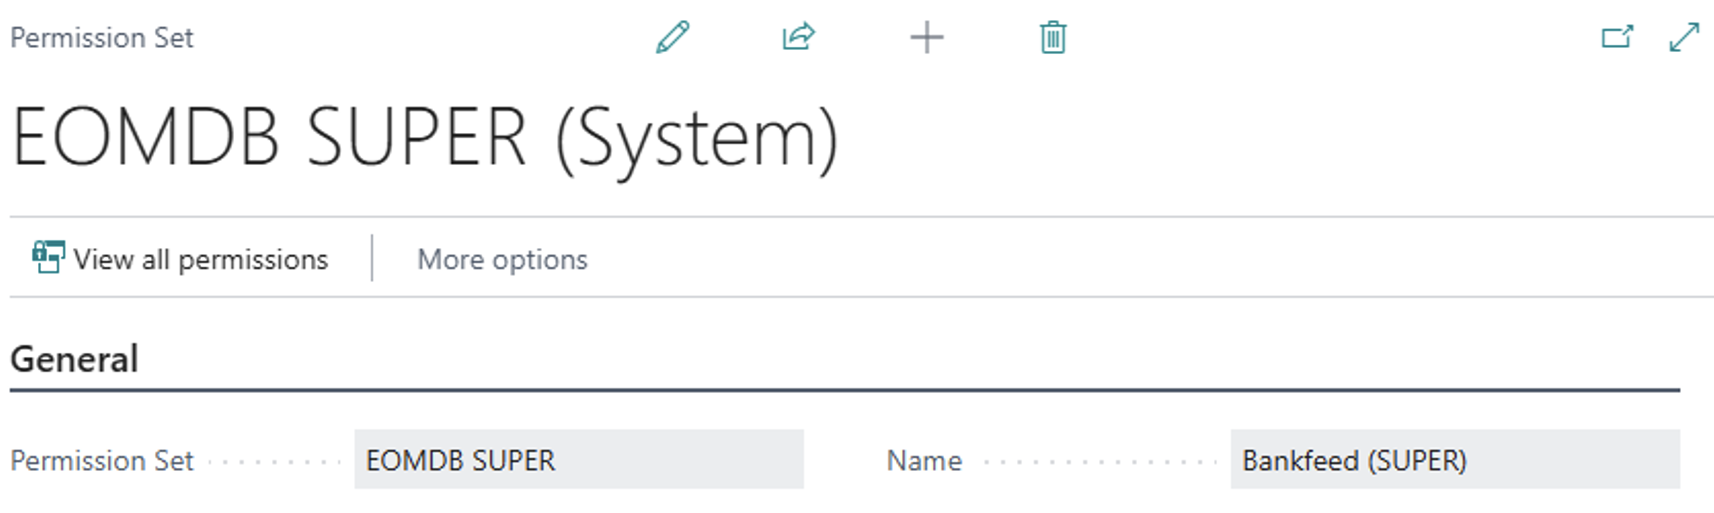
In this version, to make it easier for users, we created one Permission Set, EOMDB SUPER, which includes all other necessary Permission Sets.
TRY FOR FREE

HURRAY!
Feel free to leave your question here and we will email you the answer as soon as possible.
Hello, I found this Dynamics 365 Business Central add-on that would save me tons of time by automatically importing bank statements and matching payments with invoices. It has certain technical requirements like an up-to-date Business Central version and banks that comply with the PSD2 open banking protocol. Could you please check the requirements and let me know if we are able to use the Bankfeed app? The requirements are here: www.bankfeed.com/faq/, or you may contact the add-on’s developers at [email protected].
Bankfeed works as an add-on for Microsoft Dynamics 365 Business Central. Therefore the usage of this ERP system is necessary. The solution works best with the three latest versions of Business Central. Before installing Bankfeed, we recommend checking if the following conditions are met: 1. Open banking API (PSD2) is not occupied. If you use online payment provider services (Wordline, Wordpay, etc.), they might be connected through an open banking API. Therefore, Bankfeed will not be able to connect to this API as it is already occupied. In these situations, we can connect Bankfeed through the bank’s direct API, known as a Gateway. However, it usually requires additional banking fees and additional implementation hours. 2. Banks provide the information required for recognition and reconciliation. Even though open banking is regulated using the PSD2 protocol and is mandatory for all EU banks, the banks treat these requirements differently. The amount of information provided through the APIs and its quality can differ depending on the bank. This can lead to a situation where Bankfeed will not be able to properly identify customers/vendors or documents because of the lack of data. Here is a list of mandatory bank fields needed to enable Bankfeed’s payment recognition and reconciliation. Please check HERE if the banks you are using provide the information from these fields:
Enter your email, and you will immediately receive:
Enter your email, and you will immediately receive:
Enter your information, and you will be contacted regarding a pricing offer that suits your business needs.